From Chaos to Clarity: How We Found Our Niche in Maternity Photography
A Live Talk with Donatella Nicolini
I recently hosted a live conversation with the incredible Donatella Nicolini, a leading Italian portrait and maternity photographer, and it was packed with insights—especially for those of you still trying to figure out your path in photography.
We talked about how your style and niche aren’t always something you pick right away. Often, they find you—through trial, experimentation, and a lot of real-world experience.
Donatella’s Start: Learning What You Don’t Like
Donatella began young, working for a photography company that taught her the business side of things—how to sell prints and products, how to deal with clients. She admitted that she didn’t enjoy the sales part at all back then. But looking back, she sees how important it was. That experience built the foundation for everything she does now. Even the things she disliked helped her grow.
Maternity photography wasn’t part of some long-term vision. It started with a simple request from a client. Donatella said yes, prepared for the session, and discovered how fulfilling it could be. That one job turned into a spark that shifted her entire direction. A small step became a turning point.
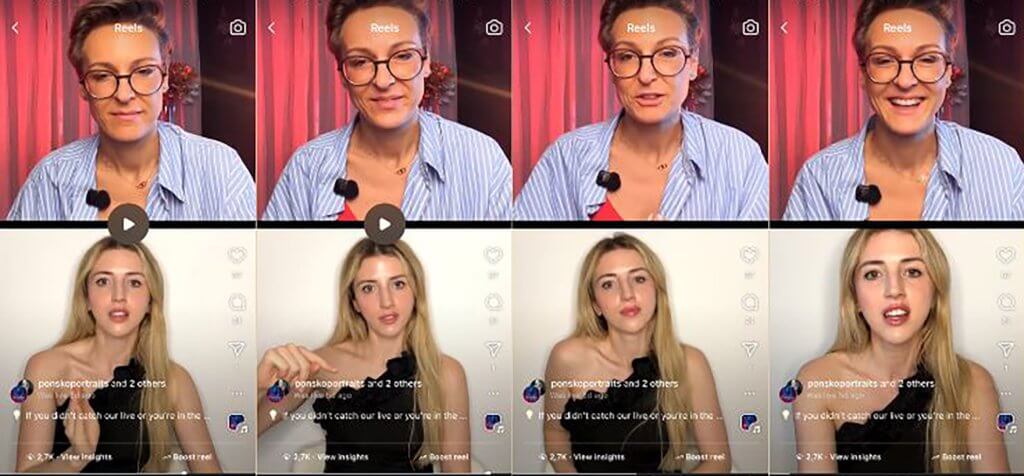
This post is a little mix of everything we talked about — the struggles, the real-life challenges, and some solutions that have helped us (and might help you too). This is the link to the recorded LIVE on INSTAGRAM.
Marta Ponsko with Donatella Nicolini – LIVE
My View on the Natural Growth of a Photographer
I truly believe the most natural way to grow as a photographer is by starting with everything. In the beginning, you say yes to every opportunity—weddings, baptisms, outdoor shoots, portraits, product photos, cake smashes, events… basically any customer who’s willing to work with you. And that’s not a bad thing! You’re learning, gaining experience, and figuring out what excites you most.
Then, slowly, things begin to shift. You start to:
Decide between natural light and studio light
Choose whether to run a home studio or go on-location
Think about whether you prefer organized sessions or event coverage
Define your work schedule—weekends or weekdays, full-time or part-time
From there, you notice one genre pulling you in more than others. You do it more. You get better at it. You become known for it. That’s when you start mastering it.
But the journey doesn’t stop there.
Once you master a genre—like I did with newborn photography—you often realize you want to go deeper, to define your own style. That’s when the real transformation begins. You focus on:
How you retouch
How you use light
How you pose and style your clients
And how you serve them in your own unique way
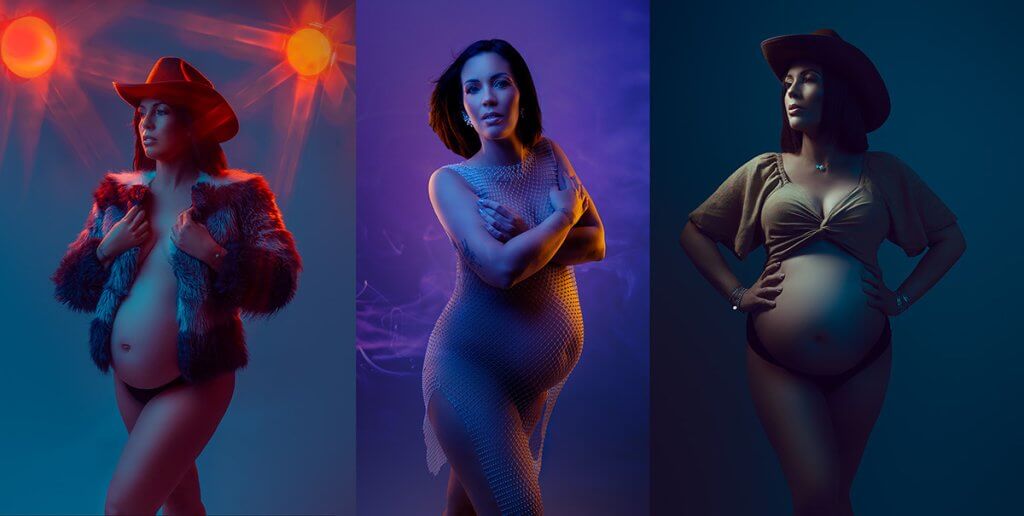
That’s exactly how I transitioned from a general newborn photographer who also did family and cake smash sessions—to a maternity photographer with a strong, recognizable style. And now, I feel I’m entering a new phase: I want to be known as a bold, creative portrait photographer who also does maternity. My niche isn’t just about the subject anymore—it’s about the style.
NEON MATERNITY PHOTOGRAPHY WORKSHOP
So, What Should You Do?
If you’re just starting out, don’t be afraid to try everything. Say yes to the work. Get your hands dirty. That chaos is how you grow. That chaos is how you find your thing.
And if you find that you actually love doing a little bit of everything, embrace that! That might be what sets you apart on the market.
There’s no single right way to grow in photography. But listening to your instincts, staying curious, and being open to change? That’s always a good path.
Let’s get back to what we love: If you’re feeling stuck with your workflow, marketing, or even how you pose and direct your sessions, I’ve got something that might help:
SPECIAL OFFER just for blog readers: Use code LIVE20 at checkout for 20% off.
If you are interested in in person photography workshops, here is the link to all the available locations: MATERNITY PHOTOGRAPHY WORKSHOP.
When the Passion Fades: Burnout in Photography
Feeling Burnt Out? You’re Not Alone — Let’s Talk About It
Lately, I’ve been having more and more conversations with fellow photographers about burnout. And during my recent Instagram Live with the amazing Natasha Ince, we went all in on this topic. It turns out… most of us are feeling it. And most of us are also blaming ourselves for it.
But here’s a little truth: burnout is real, and it’s more common than you think. And it’s not just because we’re “doing too much.” The world around us is changing, too. The photography market has become tougher — with economic shifts, lower birth rates, and a highly saturated industry, there’s more pressure than ever to keep up, stand out, and survive. All of this adds fuel to the fire when it comes to burnout.
The good news? There’s always a way out. You’re not stuck — and you’re definitely not alone.
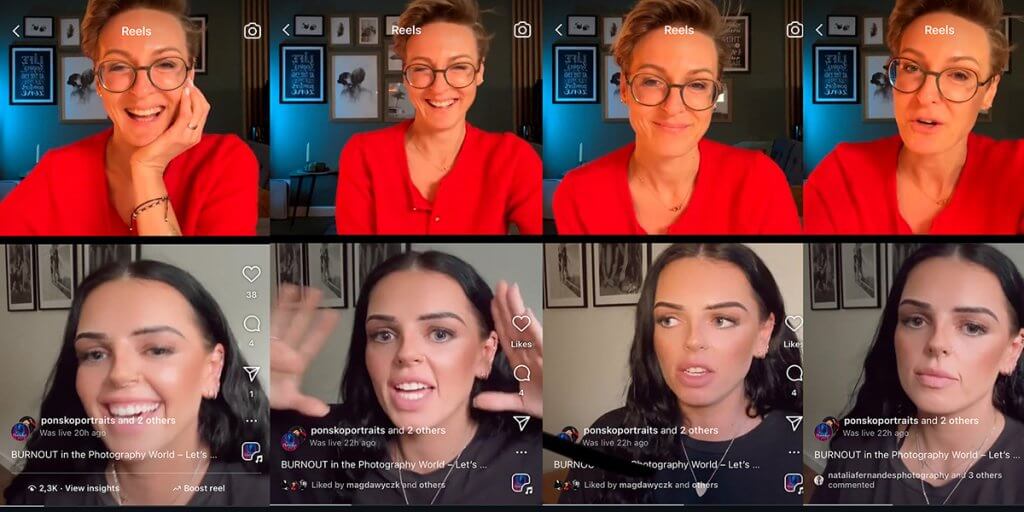
This post is a little mix of everything we talked about — the struggles, the real-life challenges, and some solutions that have helped us (and might help you too). This is the link to the recorded LIVE on INSTAGRAM.
PONSKOPORTRAITS LIVE WITH NATASHA INCE
1. We started with art… and ended up doing sales and admin
Let’s be honest — most of us didn’t get into photography to sell products, do spreadsheets, or post on Instagram five times a week. We wanted to create beautiful images and tell powerful stories.
But here we are, running businesses. And selling? That part feels super uncomfortable for many creatives.
What can help? Find a sales approach that feels natural to you. For example, I love doing In-Person Sales (IPS) because it gives me a chance to reconnect with my clients, see their reactions, and show them the magic of print. I enjoy that one more opportunity to talk about the photos and products in a personal way — and I truly believe it’s a moment that adds value.
Natasha, on the other hand, prefers proof galleries. And that’s totally okay too! It doesn’t mean it’s a “worse” way of selling — you can still make it an amazing experience for your clients and get the most out of your work. Personally, I love Photonesto because it allows me to present my galleries in a very professional and beautiful way. I can customize the gallery, make it unique for each client, and feel confident that my images are protected from screenshots. The presentation looks amazing — and my customers often say how impressed they are with how it looks and feels.
Also, if you’re not doing IPS but still want to encourage product sales, having albums and printed products on display in your studio makes a huge difference. You don’t even have to push them — just let the products speak for themselves. Place a few samples where clients can naturally see and touch them during the shoot. That quiet kind of upselling? Super effective.
In the end, it’s not about how you sell — it’s about making sure your clients see the full value of what you offer. And doing it in a way that feels right for you.
2. Too many hats, not enough time
We’re photographers, editors, marketers, social media managers, client service pros, and (in many cases) moms, partners, caretakers, and more. It’s exhausting.
And most of our time isn’t spent shooting — it’s spent behind a screen, doing “everything else.”
What can help? Set real boundaries. Block time for specific tasks. Outsource if you can. And please, schedule breaks. If you just finished a busy round of mini sessions and you feel dead inside — rest. Celebrate the wins, take a day off, breathe. You’re allowed.
3. Social media is a full-time job now
Remember when we used to post a pretty picture and people actually saw it? Yep, those days are gone. Now it’s reels, stories, captions, hashtags, trends… and it can honestly feel like a whole separate job on top of everything else.
What can help? Keep it simple. You don’t have to be everywhere. Pick one or two platforms and show up in a way that feels authentic. If you’re not into video or talking to the camera — that’s totally fine. Show your behind-the-scenes, your lighting setups, your editing flow — that’s gold. You don’t have to dance. Promise.
That said, if you do commit to using social media, try to do it consistently. It’s one of those “either do it or don’t bother” things. Consistency builds trust. There are plenty of tools out there that can help — apps that automate posting, schedule your content in advance, or even help you create graphics with just a few clicks. Make social media work for you, not the other way around.
But here’s the real truth: You don’t have to rely on social media to build a successful business. You can absolutely grow through a strong website, good SEO on Google, or even simple, good old word of mouth — especially if your customer experience is top notch.
In the end, it’s about choosing a system that supports your goals and your lifestyle. There’s no one-size-fits-all — and that’s the beauty of it.
4. The emotional side of creating
When people critique or ignore our work, it hurts. Let’s not pretend it doesn’t. Our art is personal — it’s a part of us. So when we don’t get feedback, or worse, when we get negative feedback, it can hit really hard.
And sometimes, it’s not even criticism — it’s silence. No likes, no messages, no reactions. And that can be just as discouraging.
What can help? Start collecting kind words. Seriously — screenshot sweet messages, testimonials, even short “thank you” notes from clients. Create a “feel-good” folder and open it whenever the self-doubt creeps in. Better yet, use those words! Post them on your website, share them on social media, include them in your brochures. Show people why you’re loved — and let your actual clients speak for your value.
Their words can become your value proposition — a way of presenting why people should choose you over someone else.
Also? Please take care of your mental health. Stop comparing yourself with others. Unfollow accounts or leave Facebook groups that make you feel small or overwhelmed. And for the love of peace — stop scrolling if it makes you feel worse about yourself.
It’s okay to mute the noise. Focus on your path. Protect your creative energy. Because you are more than your likes, your reach, or your last session.
5. Trying to always be original
There’s so much pressure these days to constantly reinvent yourself — new props, new backdrops, new trends, new locations. And if you haven’t fully found your own style yet, it can feel like you’re just floating from one idea to the next, chasing what’s “in” instead of what feels right.
What can help? Let yourself play. Seriously. Give yourself permission to experiment in the studio. Try a new lighting setup just for fun. Use what you already have in a totally new way — before buying anything new, ask yourself: Have I made the most of this yet?
Break the routine. Shake things up. If you find yourself recreating the same poses or setups over and over — pause and try something different. Even if it “fails.” Actually, especially if it fails.
Because here’s the thing: failure is part of creativity. It teaches you, guides you, and pushes you closer to finding what actually works for you. Once you start embracing the process, not just the result, everything shifts. You stop copying and start creating — and that’s where the magic happens.
And once you define your unique style? Everything becomes easier. You’ll know where you’re going, and you won’t feel the need to chase every trend that shows up on your feed.
Wppi conference presentation with Backdropsgallery and Shtooka Atelier
6. Money worries are no joke
When you’re self-employed, that pressure of “Can I really make a living from this?” is always lingering in the background. Add rent, bills, kids, school fees, groceries… and it can all become overwhelming, fast.
I remember those nights when I couldn’t sleep because I was worried about not having enough clients. The fear of not booking enough sessions was eating me up. And that kind of stress? It doesn’t just mess with your mood — it totally kills your focus and creativity.
What can help? Start by getting really clear on your pricing and costs. Know what you need to earn to cover your life and business expenses — and then price accordingly. Don’t guess. Don’t undersell.
Before buying new gear, pause and ask yourself: Do I really need this? Will it actually change my business? Sometimes, less gear and more focus is exactly what you need.
Also — track your numbers. Look at your income, your costs, your conversion rate. Adapt your approach to match what’s happening in the market. If things slow down, don’t panic — look at what you can shift instead.
And here’s something I’ve learned the hard way: build up a small cushion of savings before you start spending on shiny new equipment. That financial buffer can give you peace of mind — and allow you to make smarter, not panic-driven, decisions.
7. The market has changed — a lot
Let’s face it — we’re no longer working in the same industry we were a few years ago. There are lower birth rates, economic uncertainty, and tons of competition. Add to that a changing customer mindset, and it’s easy to feel like you’re constantly swimming upstream.
What can help? The answer is simple, but not always easy: adapt. What worked in 2019 might not work today — and that’s not a failure, it’s just reality.
Maybe it’s time to rethink your offers, update your pricing structure, or tweak your messaging. Ask yourself: – Does your website speak to the clients you want now? – Are your session packages relevant to your current market? – Could your brand story be stronger or more clear?
Think beyond Instagram, too. Some things that can make a real difference:
Update your website content — make it clear, personal, and search-friendly
Print leaflets and drop them off in places where your ideal clients go
Collaborate with someone trusted in your community — a doula, pediatrician, midwife, or even a local influencer
Collect Google reviews and encourage happy clients to share their experience
Improve your studio visibility — signage, directions, parking info
Reach out to local mom groups or women’s communities and introduce yourself
There are so many creative ways to stay visible and valuable — but they all start with being open to change and taking one small step at a time. Evolving is part of staying in business. And you can grow through it.
marta Ponsko, photography equipment
8. Feeling stuck and isolated
Sometimes we just feel like we’re doing everything wrong — and we don’t know who to talk to about it.
What can help? Talk to someone. A friend, a mentor, another photographer. Venting is healthy. Getting another perspective is a game-changer. Don’t keep everything in your head — that’s where burnout festers.
9. No strategy, just… chaos
You’re doing a lot. Probably too much. But here’s the real question — are you doing the right things?
It’s so easy to stay busy and still feel stuck. You jump from editing to emails, from Instagram to planning, but at the end of the day, you’re exhausted… and unsure if any of it really moved your business forward.
What can help? I know — the word strategy sounds overwhelming. But it’s really just about organizing your activities and creating a clean roadmap.
Write things down. All of them. Then ask: – What brings real results? – What feels good but doesn’t convert? – What’s just noise?
Break your to-do list into simple categories:
Quick wins – small actions that create results fast
Long-term growth – things that need time but will pay off
Time-wasters – things that eat up your energy and don’t move the needle
Once you see it all on paper, everything becomes clearer. You’ll know what to prioritize, what can wait, and what you should stop doing altogether.
Make it a habit to check in with yourself weekly or monthly — take 15 minutes to plan and refocus. A little structure can give you a lot of peace.
10. You’ve stopped learning
When everything starts to feel stale, stuck, or uninspiring — it’s often because we’ve stopped feeding our curiosity. Creativity needs input, not just output.
What can help? Try something new. Watch a class, join a workshop, or even just tweak your lighting setup to see what happens. Go to a conference, meet other photographers, organize a fun project with a friend — anything that gets you out of autopilot and back into creation mode.
Sometimes, the smallest spark can lead to a big shift. Surround yourself with people who inspire you. Build or join a supportive group where you can share, learn, and grow. And make sure you have the right skills — because confidence comes from knowing how to create what you imagine. Learning is not just for beginners — it’s fuel for everyone.
Let’s get back to what we love: If you’re feeling stuck with your workflow, marketing, or even how you pose and direct your sessions, I’ve got something that might help:
SPECIAL OFFER just for blog readers: Use code LIVE20 at checkout for 20% off.
I hope this post gave you a little clarity and reassurance. Burnout doesn’t mean you’re failing. It means you’ve been trying — really hard. And maybe now, it’s time to take a breath, look around, and reset. On your terms.
NEXT LIVE: May 28th, 2025 at 9.00 pm CET with another interesting guest – famous Italian maternity photographer. Can you guess who she is? Let’s meet on Instagram!
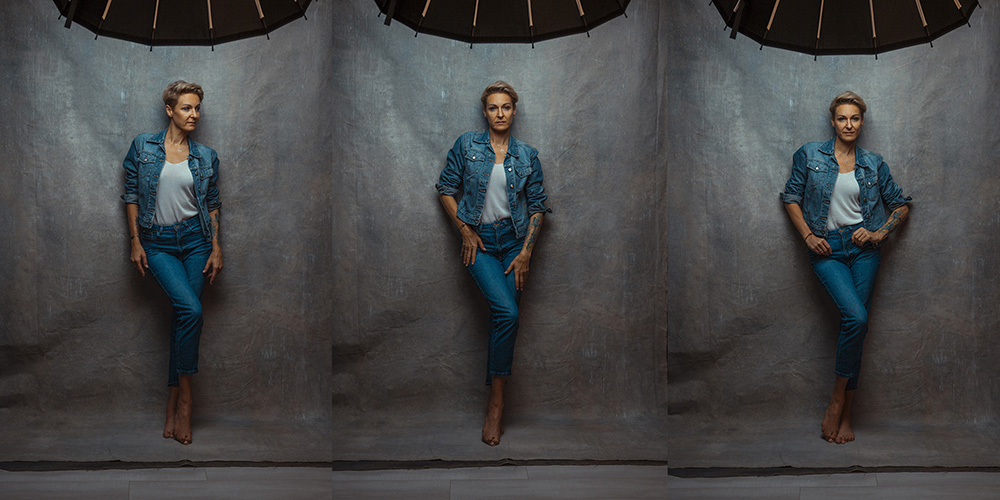
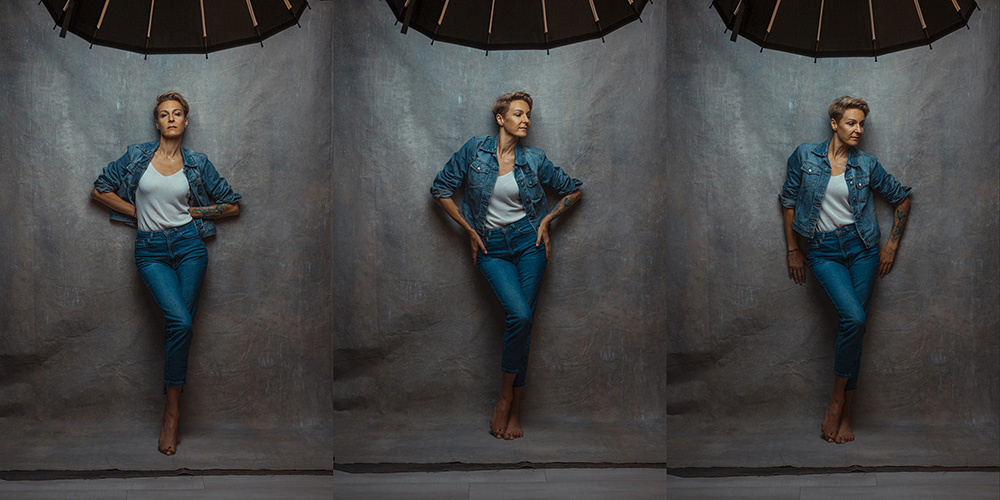
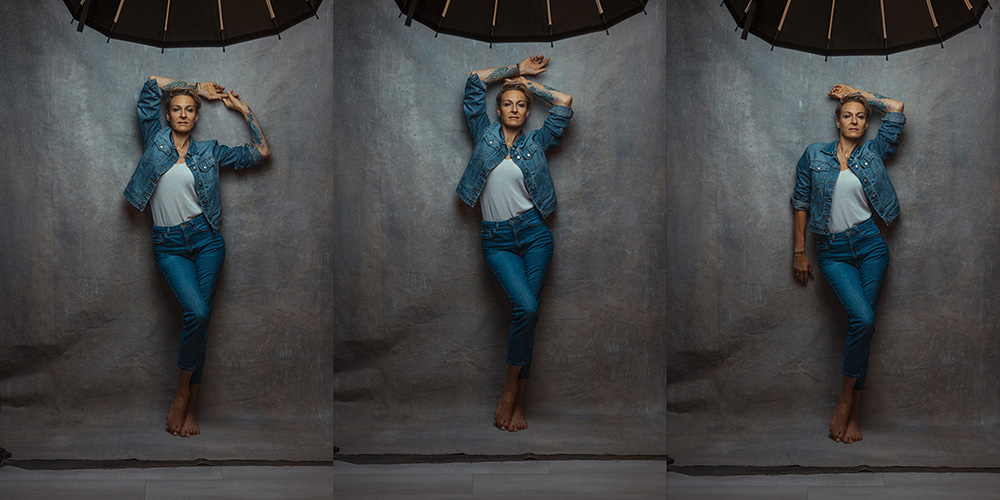
POSING BY THE WALL – POSING IDEAS
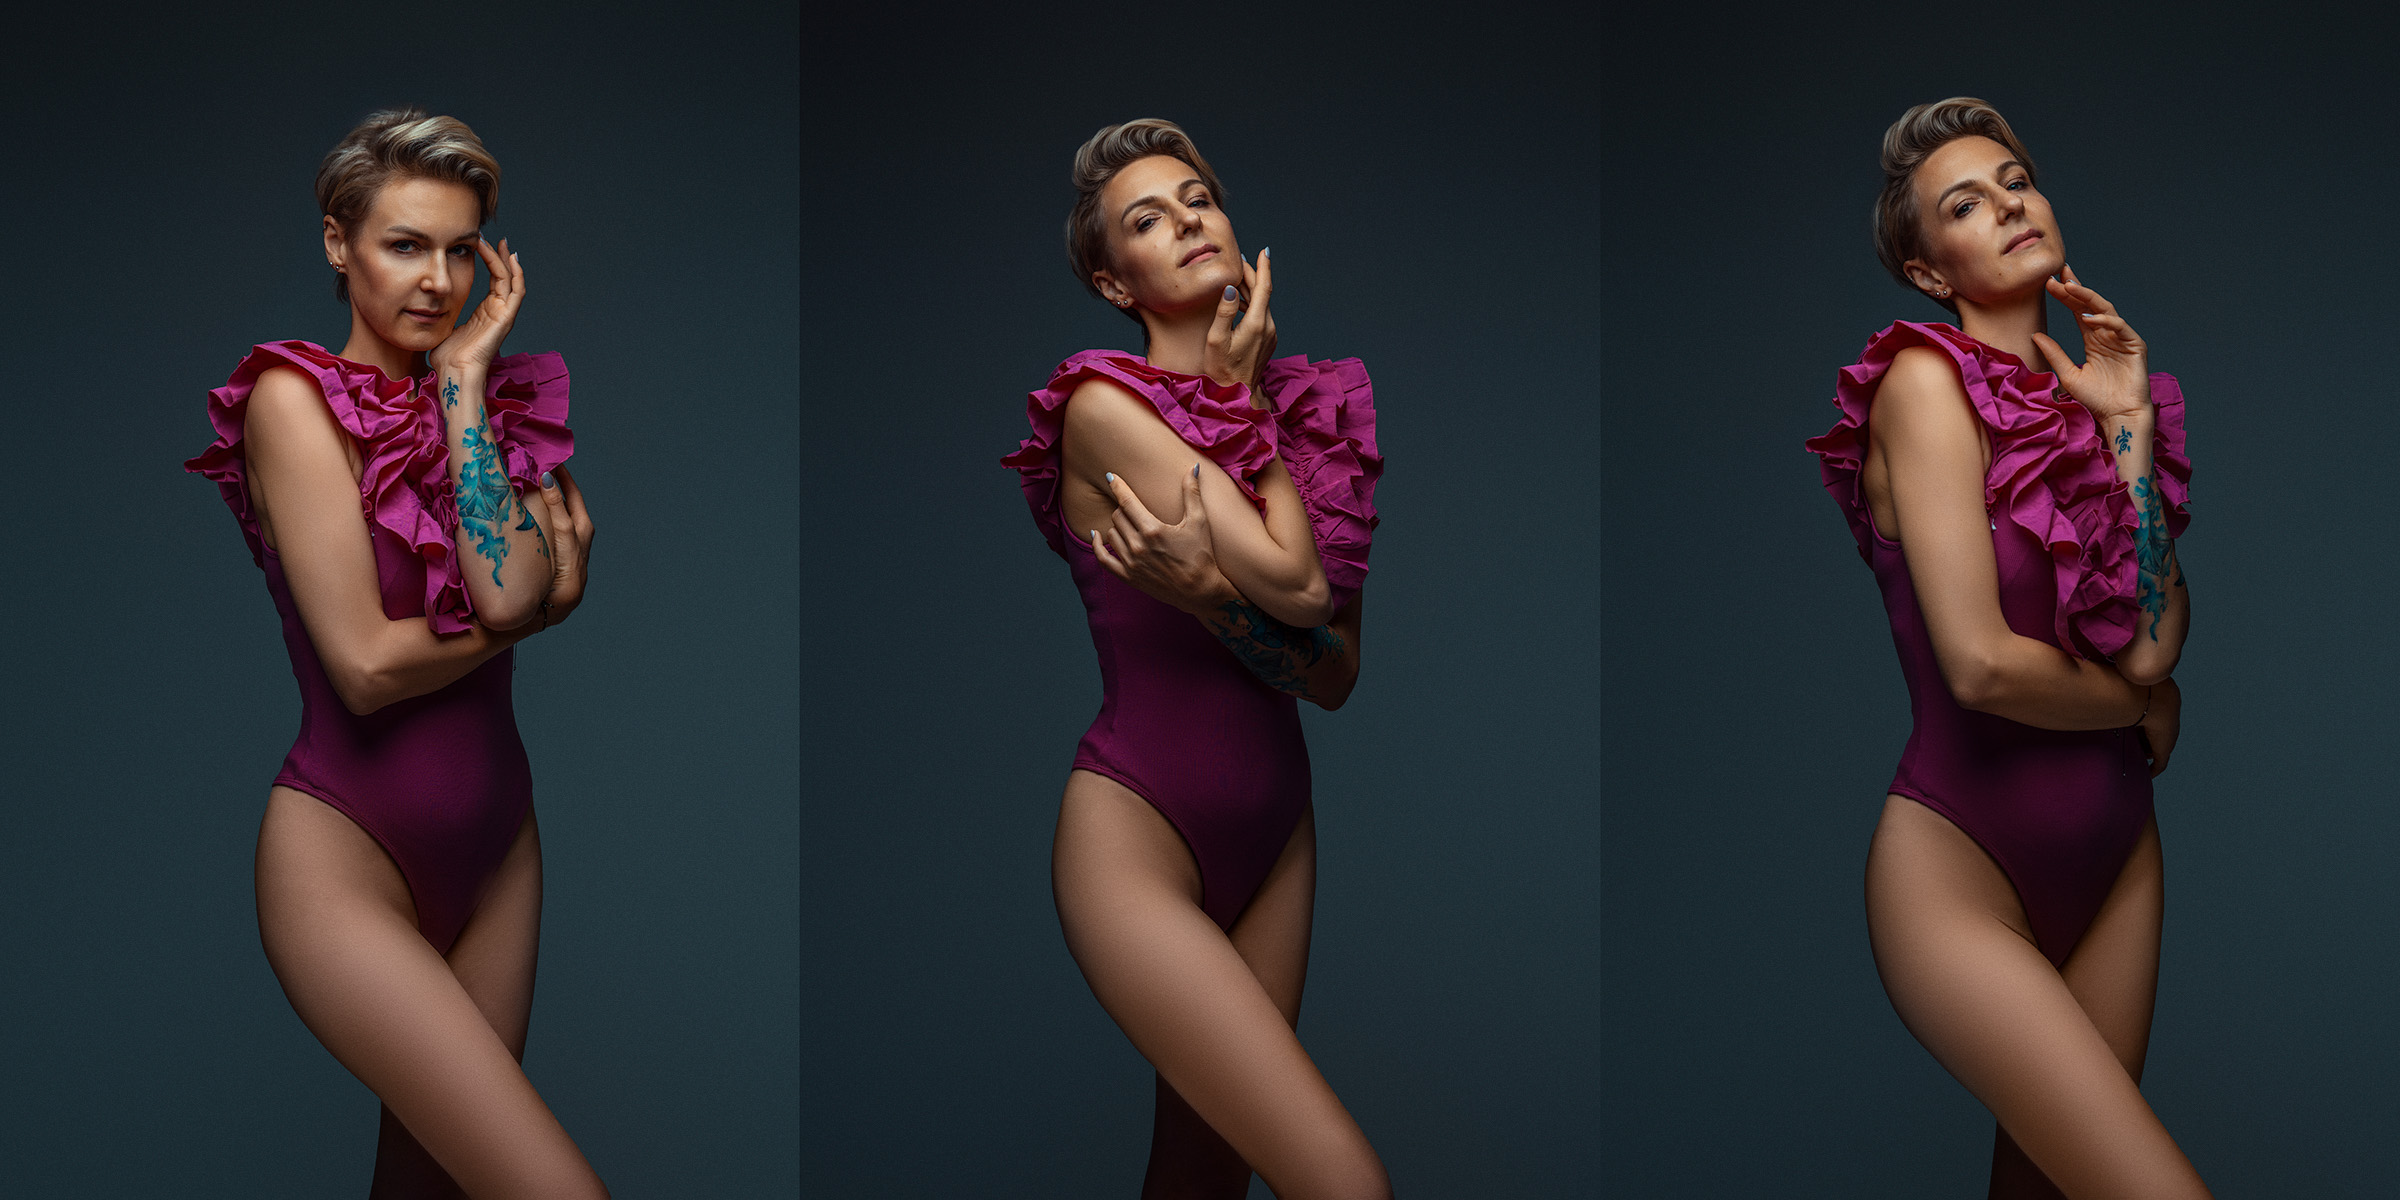
Using a wall in your photoshoots is a great way to add structure and confidence to a pose. It gives the model something to lean on, making her feel more natural while creating interesting shapes in the frame.
Start by having her rest against the wall—her back, shoulder, or even just a hand. Try different angles by shifting her weight onto one leg and slightly bending the other, resting it on her toes. This instantly adds more movement and shapes the body better.
If you’re interested in exploring more posing techniques and learning how to use studio light to showcase your pregnant models in the best and most creative way, join us for a ONLINE CREATIVE MATERNITY PHOTOGRAPHY ACADEMY. POSING has also an important part of the in person workshops where we practice together some posing flows and you can see me working with a model. If you want to see it online – a great opportunity to learn posing flow is FLY ON THE WALL. All workshops are listed here: PHOTOGRAPHY WORKSHOPS SCHEDULE.
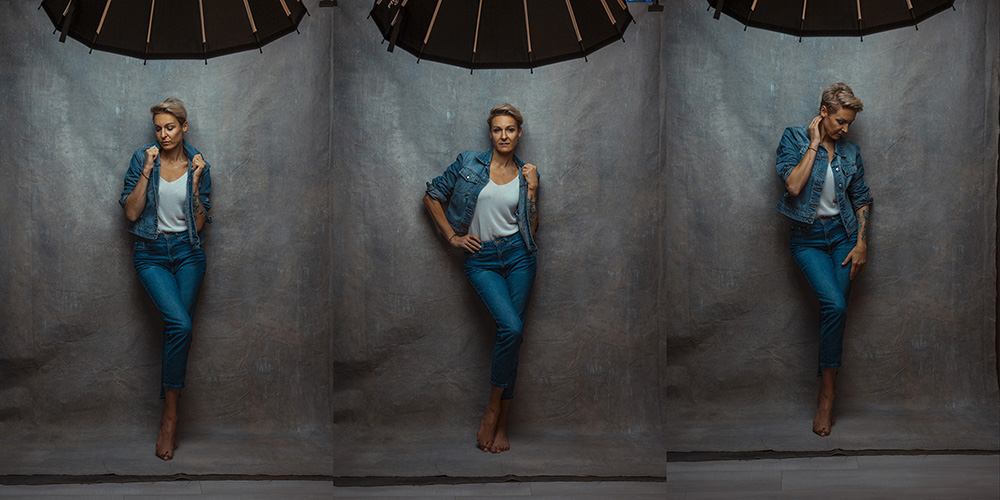
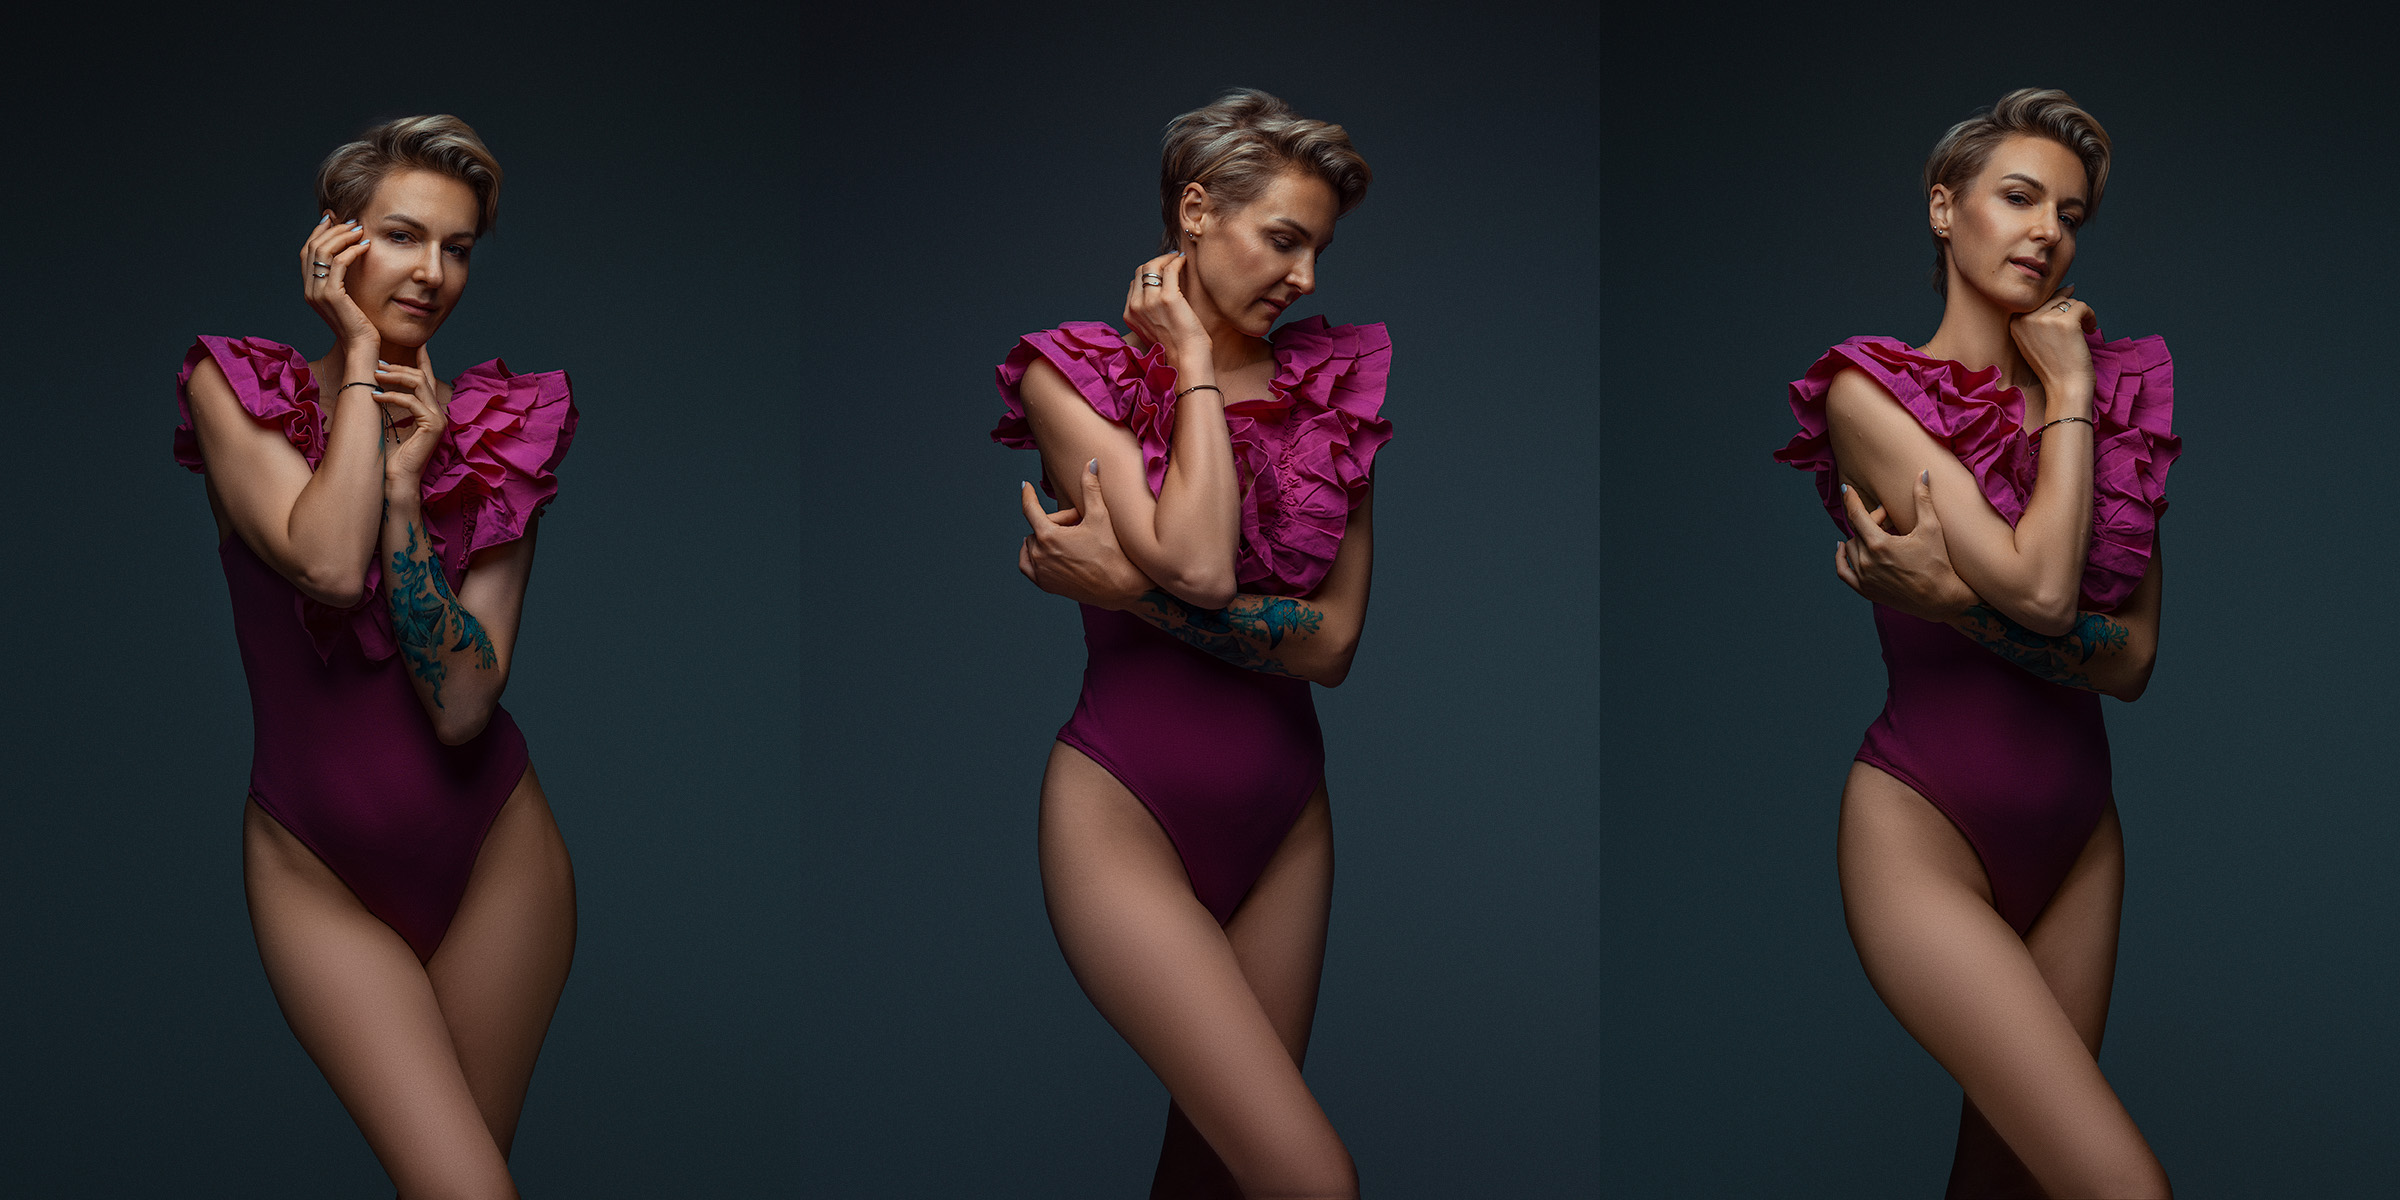
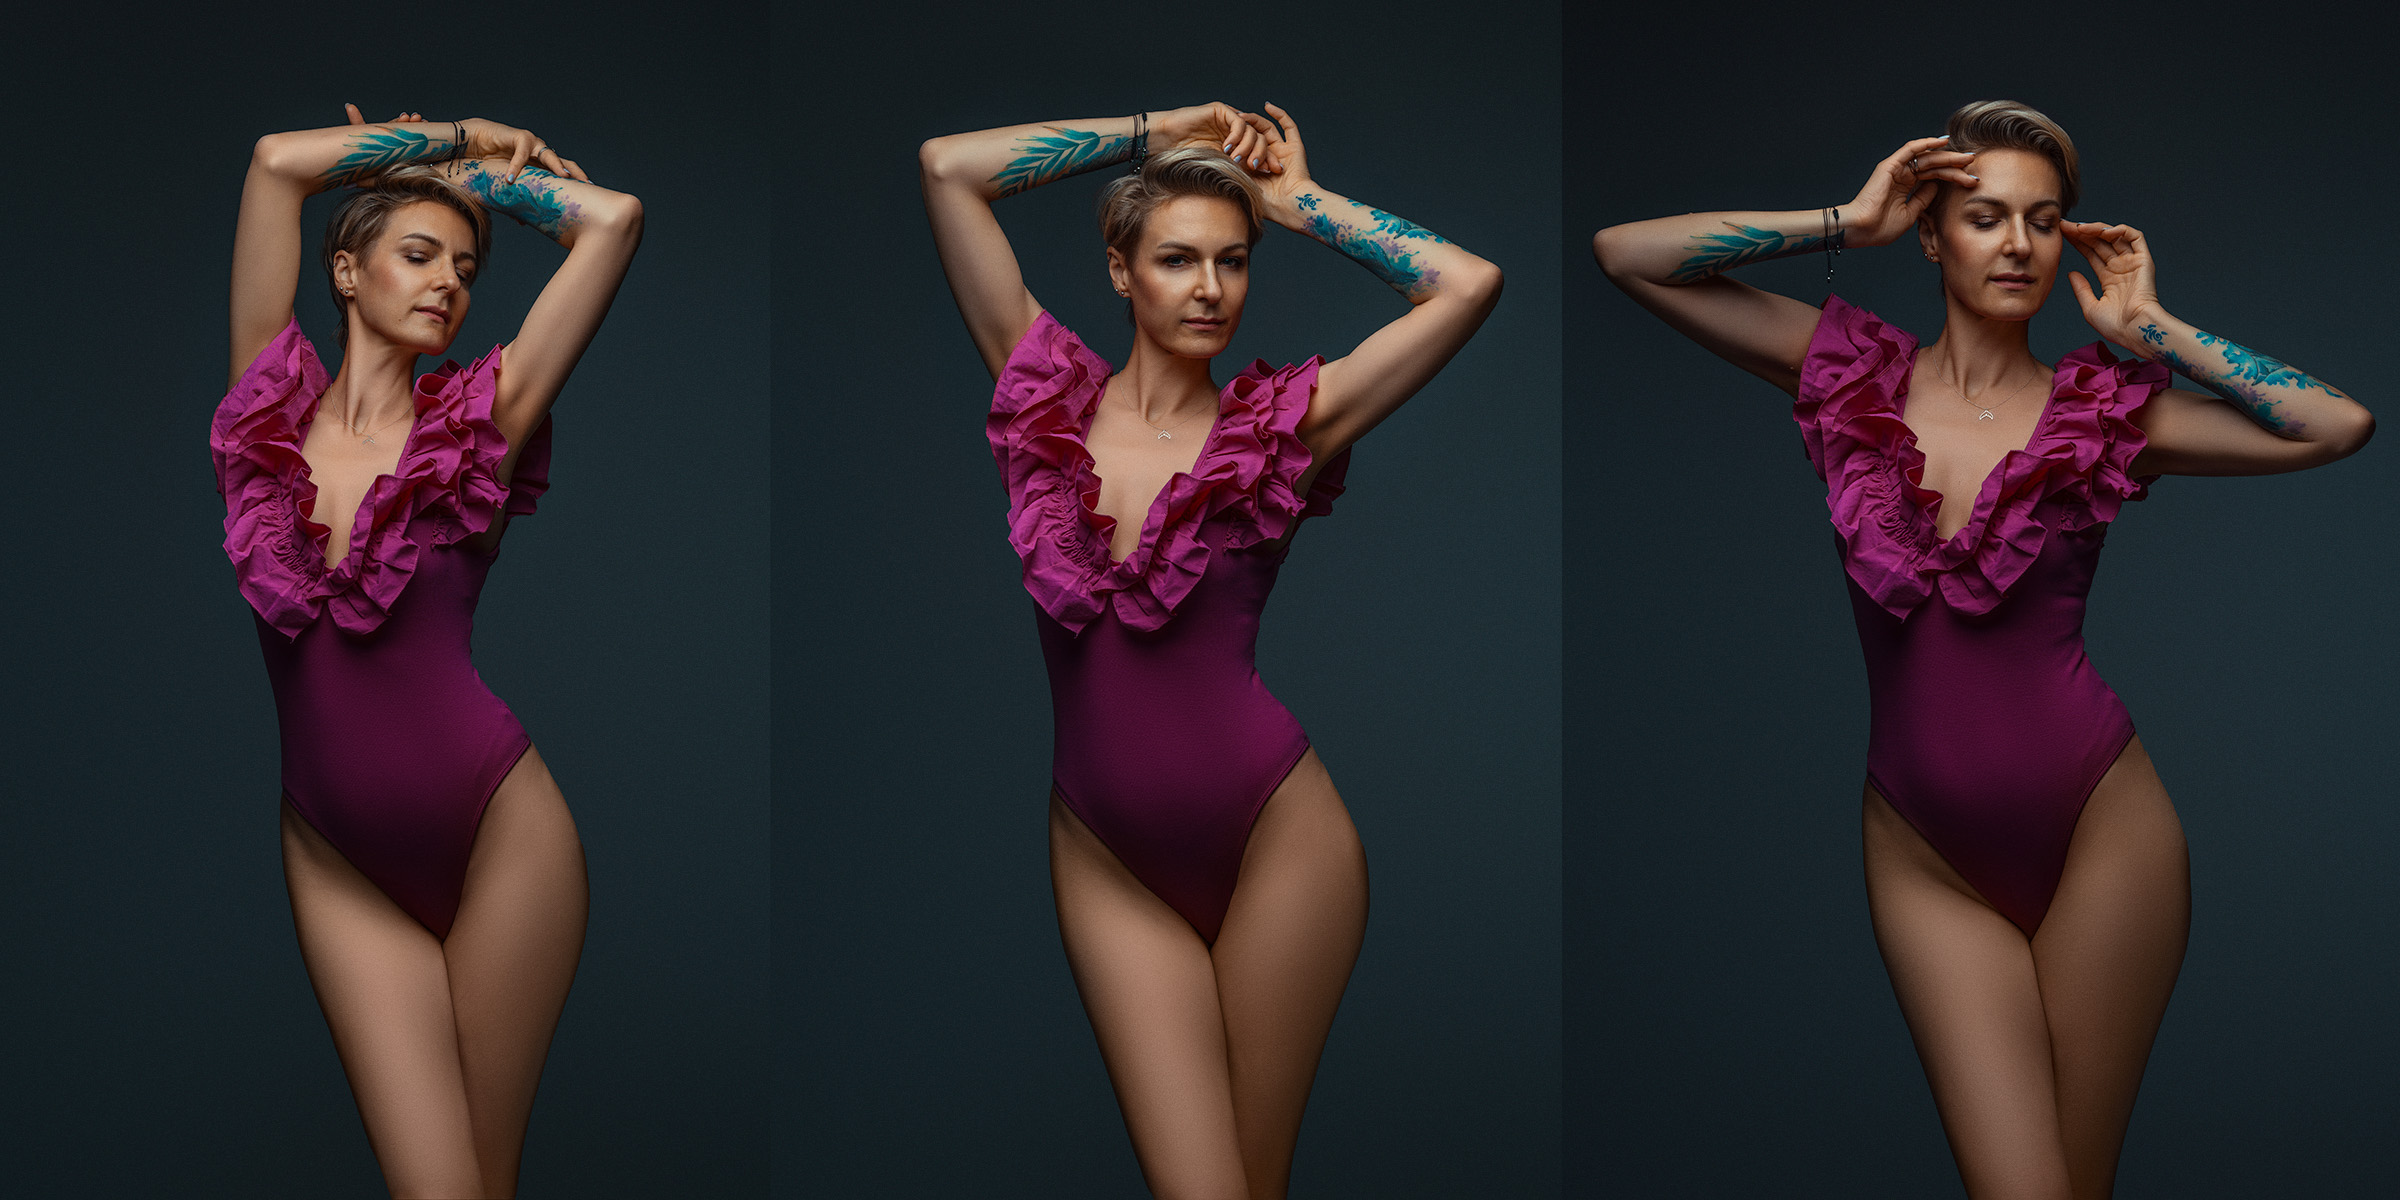
DON’T FORGET TO POSE EVERY SINGLE PART OF THE MODEL’S BODY
Hands make a big difference too—she can run fingers through her hair, rest one hand on her hip, or lightly touch the wall for a more relaxed look. The wall also helps create contrast, whether you’re going for bold, dramatic shadows or soft, natural light. Play around with lighting and negative space, and you’ll see how a simple setup can completely change the mood of a photo.
Don’t forget details—if the model leans in too much, it can cause unnecessary compression in the neck and arms, so guide her to keep a soft, natural posture. If you’re working with maternity clients, use the wall as a support while posing the hands around the belly to highlight the shape beautifully. The more you experiment, the more you’ll see how small adjustments can completely transform the energy of the shot.
Expert hand posing tips for creative photography.Graceful hand posing techniques by Marta Ponsko for elegant portraits.Refined hand posing tips for confident portraits.Elegant hand positions for stunning portraits.Master expressive hand poses with Marta Ponsko.Transform portraits with Marta Ponsko’s posing tricks.
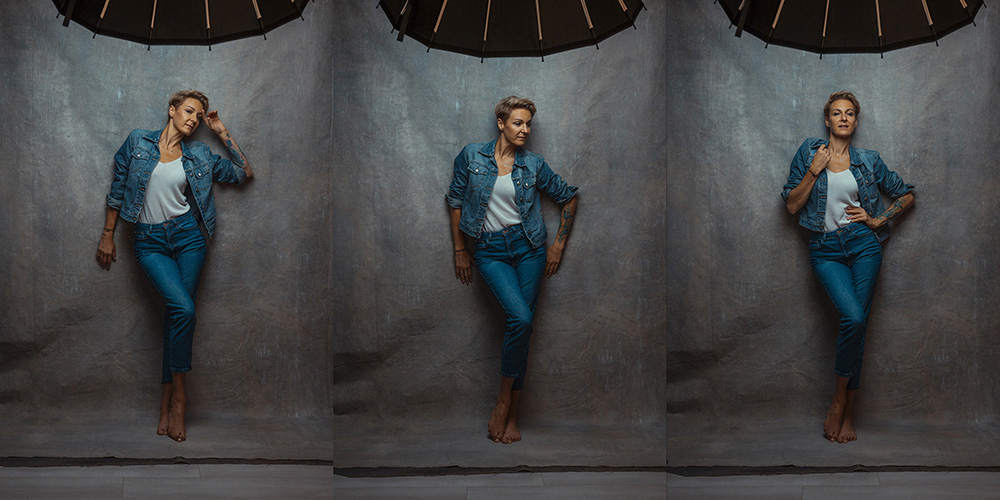
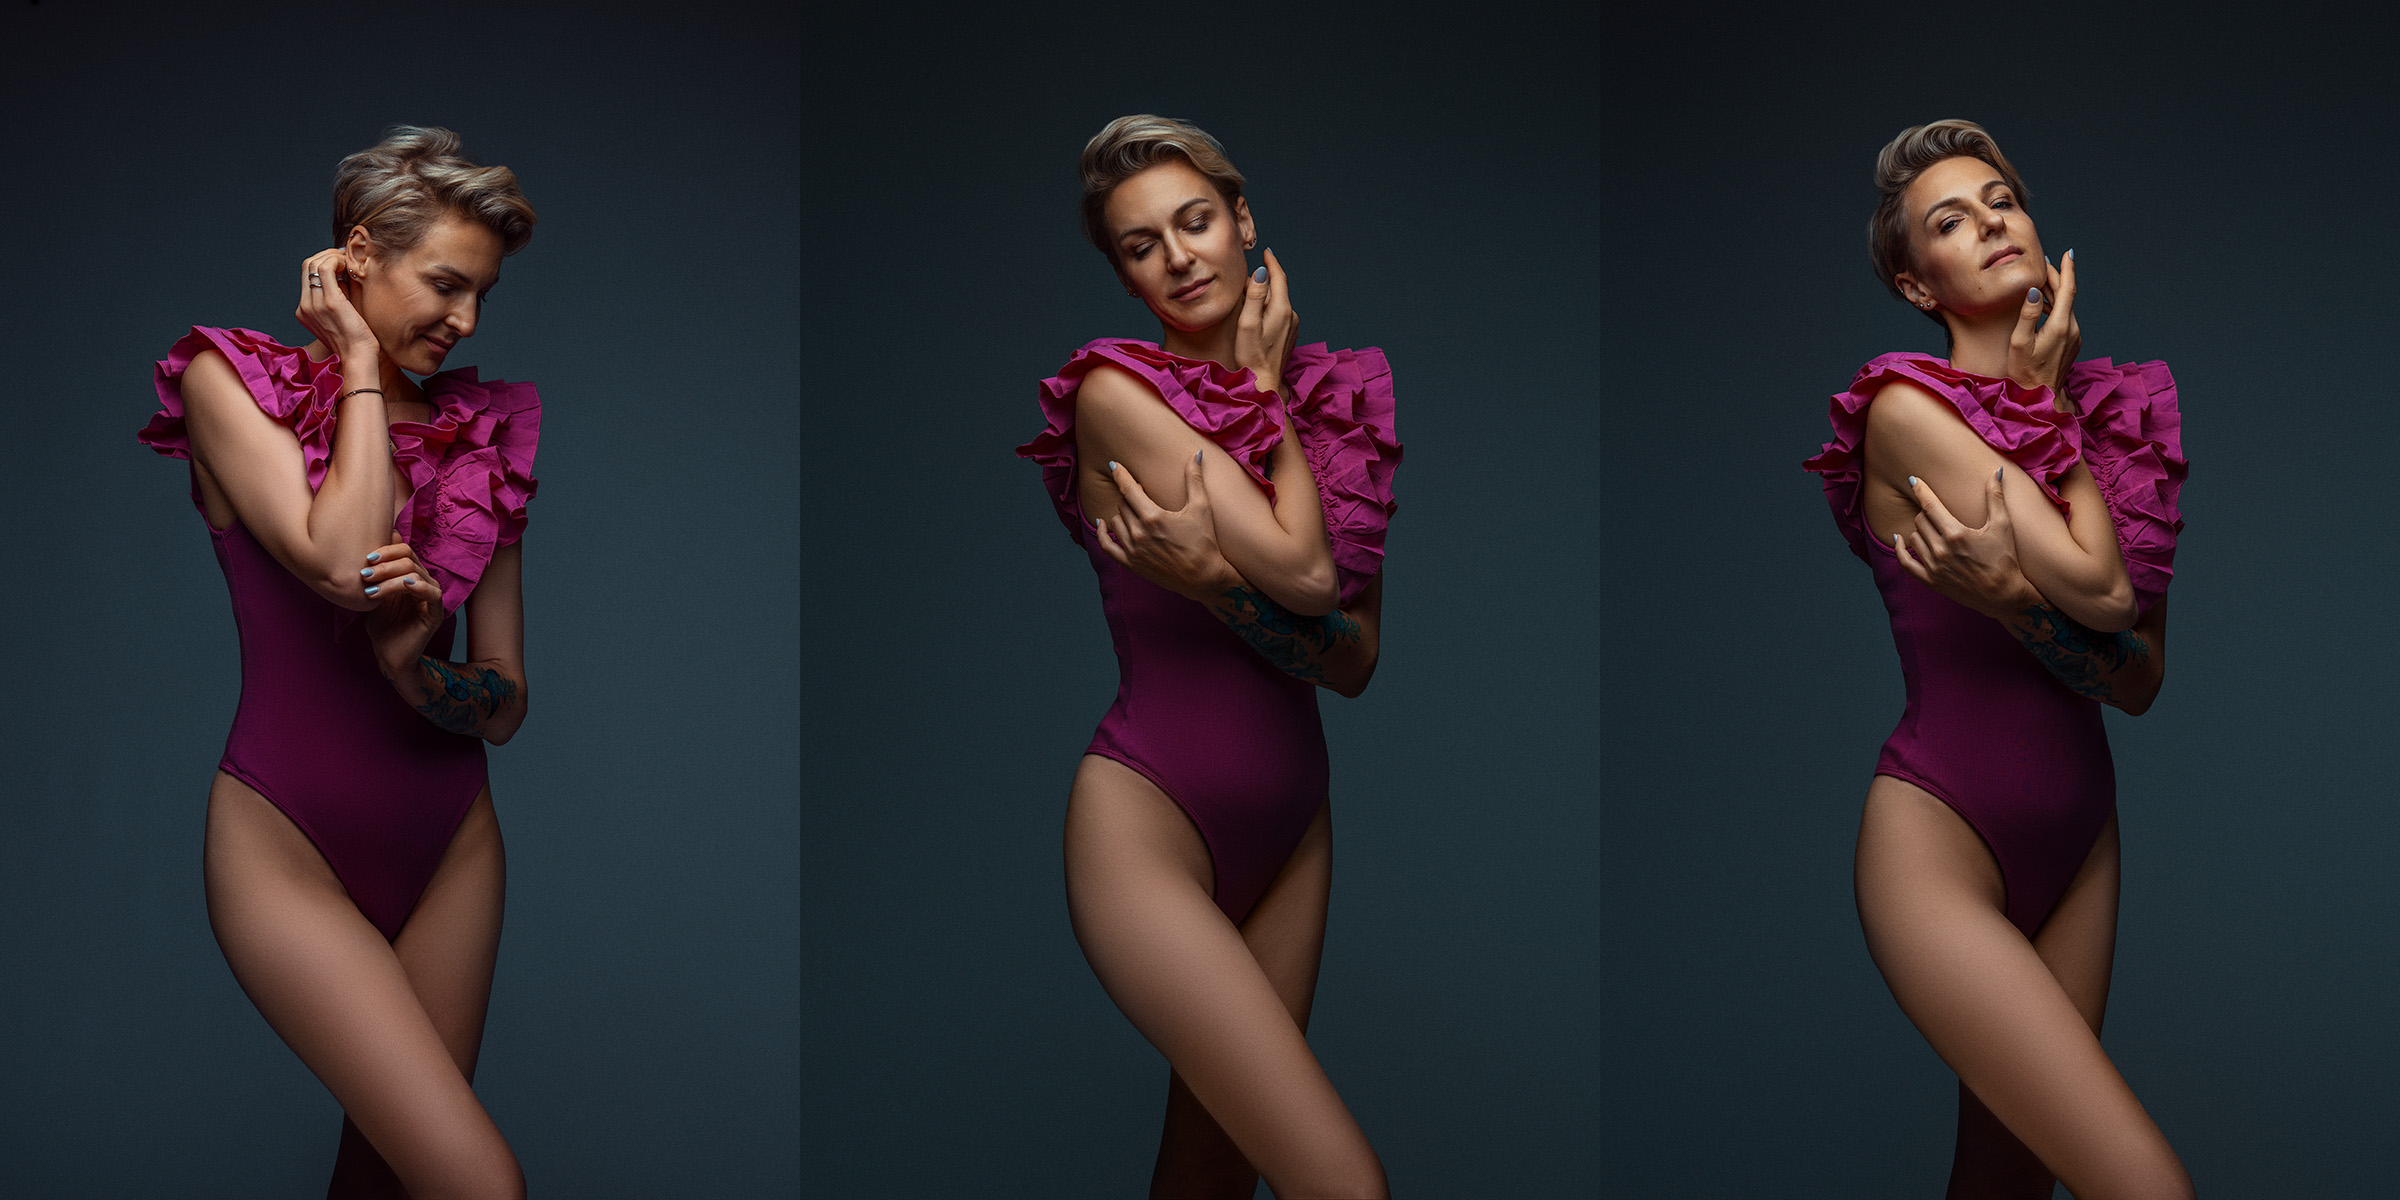
POWERFUL POSING IDEAS FOR MATERNITY AND PORTRAIT PHOTOGRAPHERS
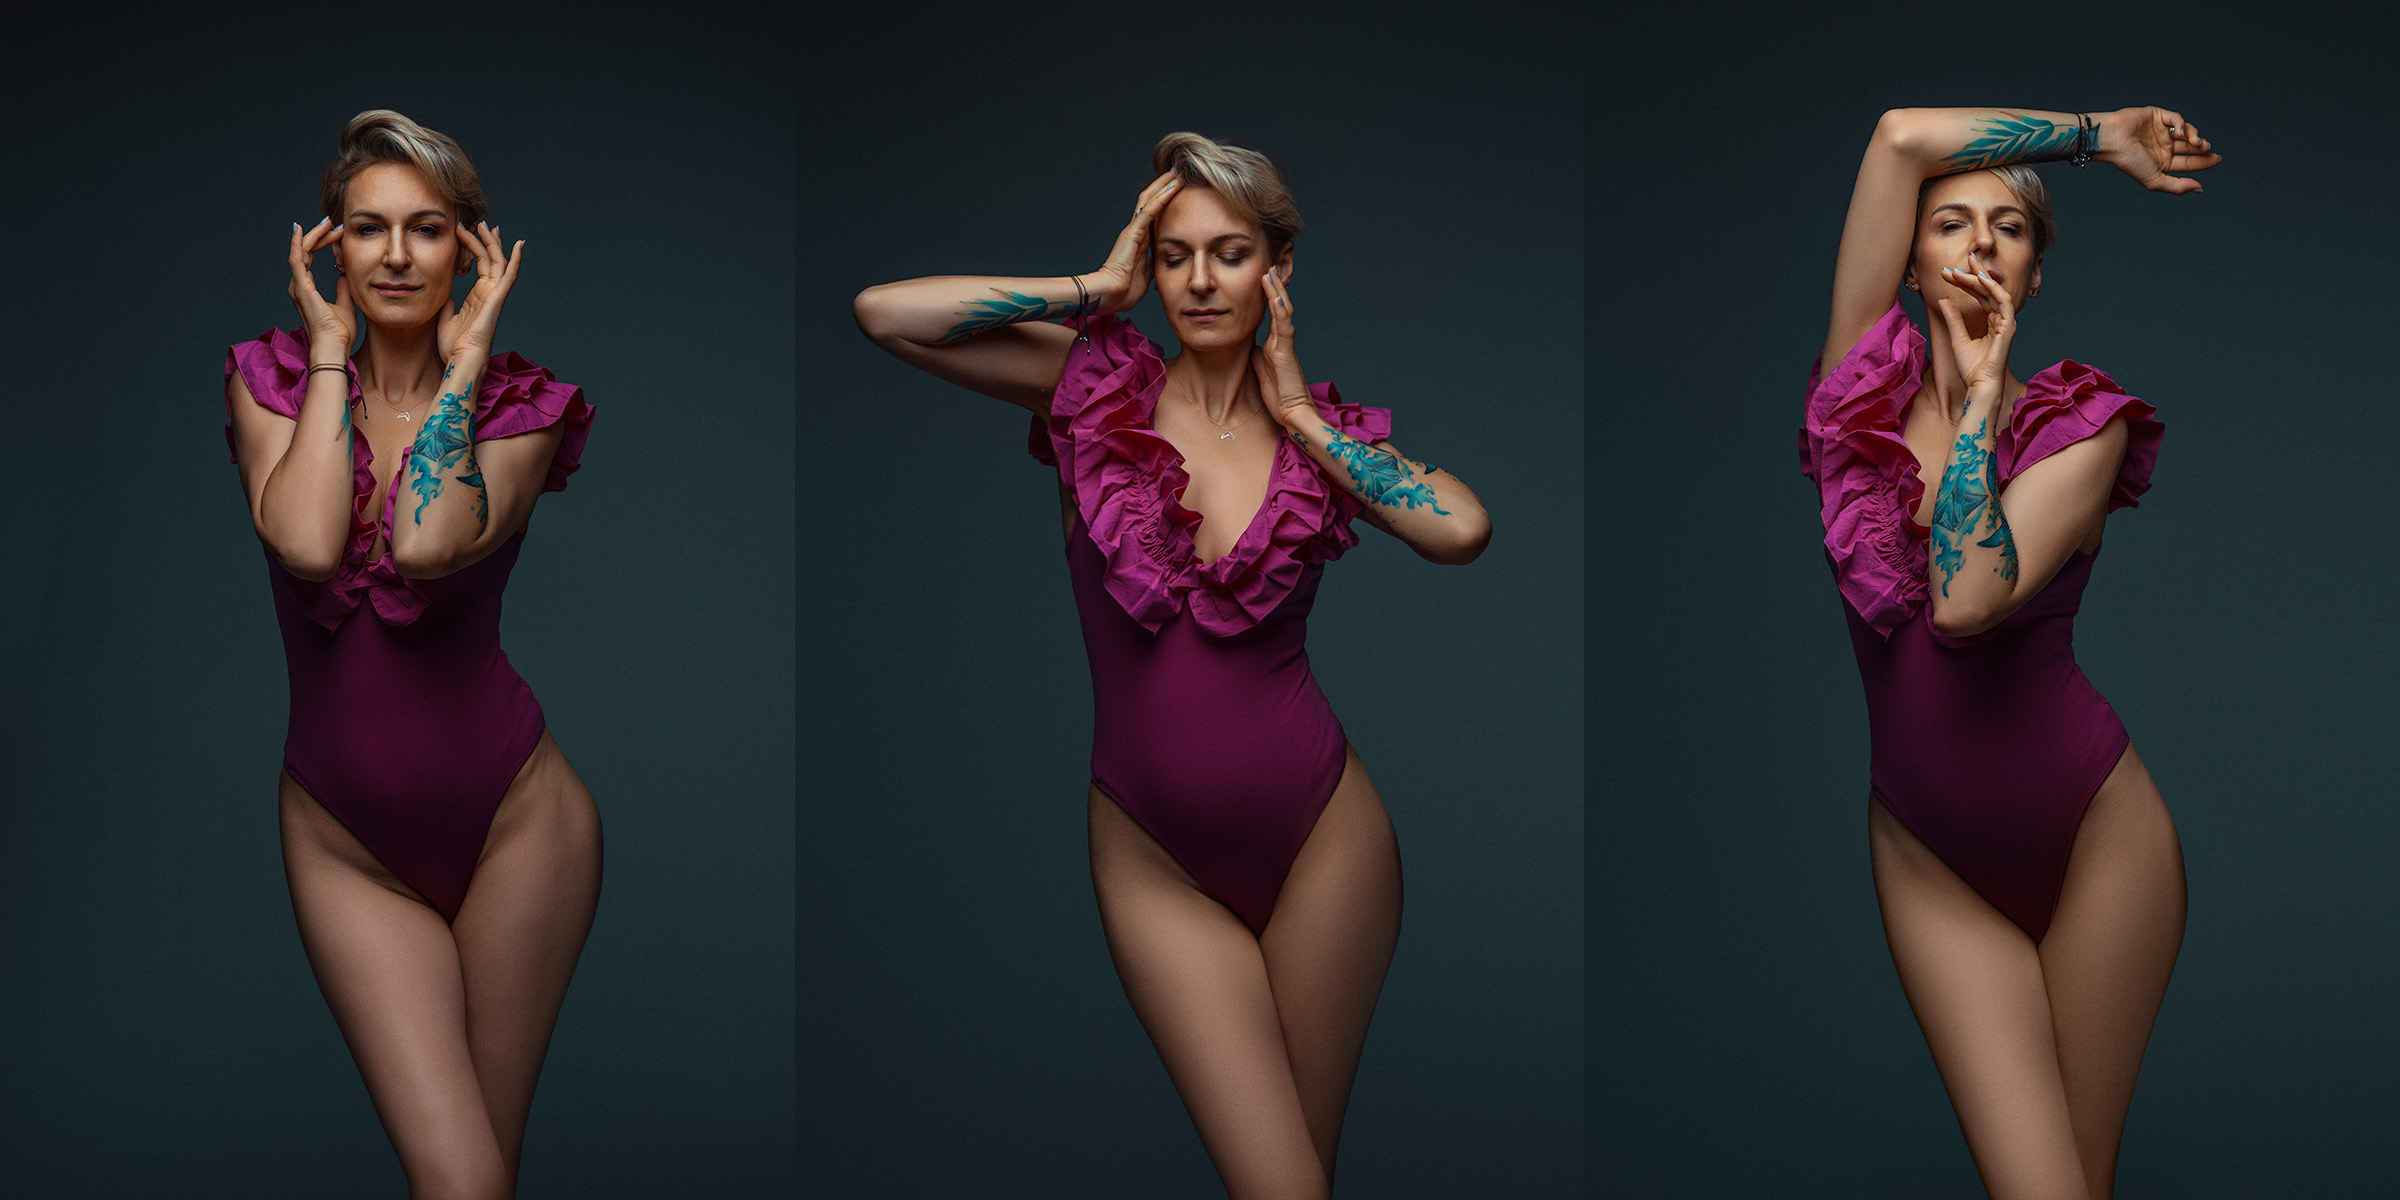
Here are some posing ideas for photographers: Nailing hand positions in standing poses can take your portraits to the next level. Seriously, hands can make or break a shot—they show emotion, add energy, and bring the whole composition together. The trick? Keep them relaxed. No stiff, awkward mannequin hands allowed!
Have your model try things like resting a hand on their hip, running fingers through their hair, or holding something—like a jacket or bag—to add a little story to the image. Play around! Hands can say so much, from “I’m confident and unstoppable” to “I’m soft and dreamy.” Want more drama? Get them to brush a hand across their face or let their arms sway naturally.
And don’t forget lighting and angles—they’re your best friends when it comes to showing off that effortless, expressive vibe. Done right, those hands will make your portraits pop and leave everyone asking how you did it!
If you’re interested in exploring more posing techniques and learning how to use studio light to showcase your pregnant models in the best and most creative way, join us for a ONLINE CREATIVE MATERNITY PHOTOGRAPHY ACADEMY.
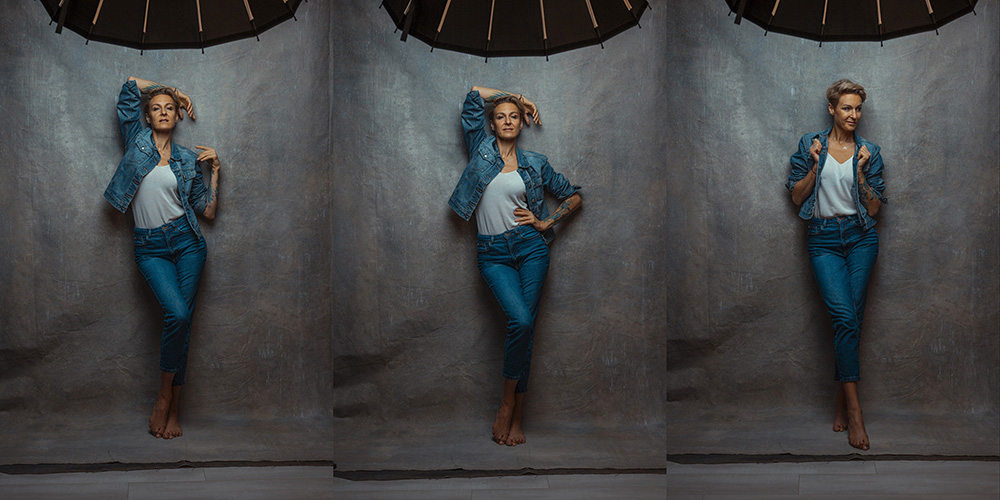
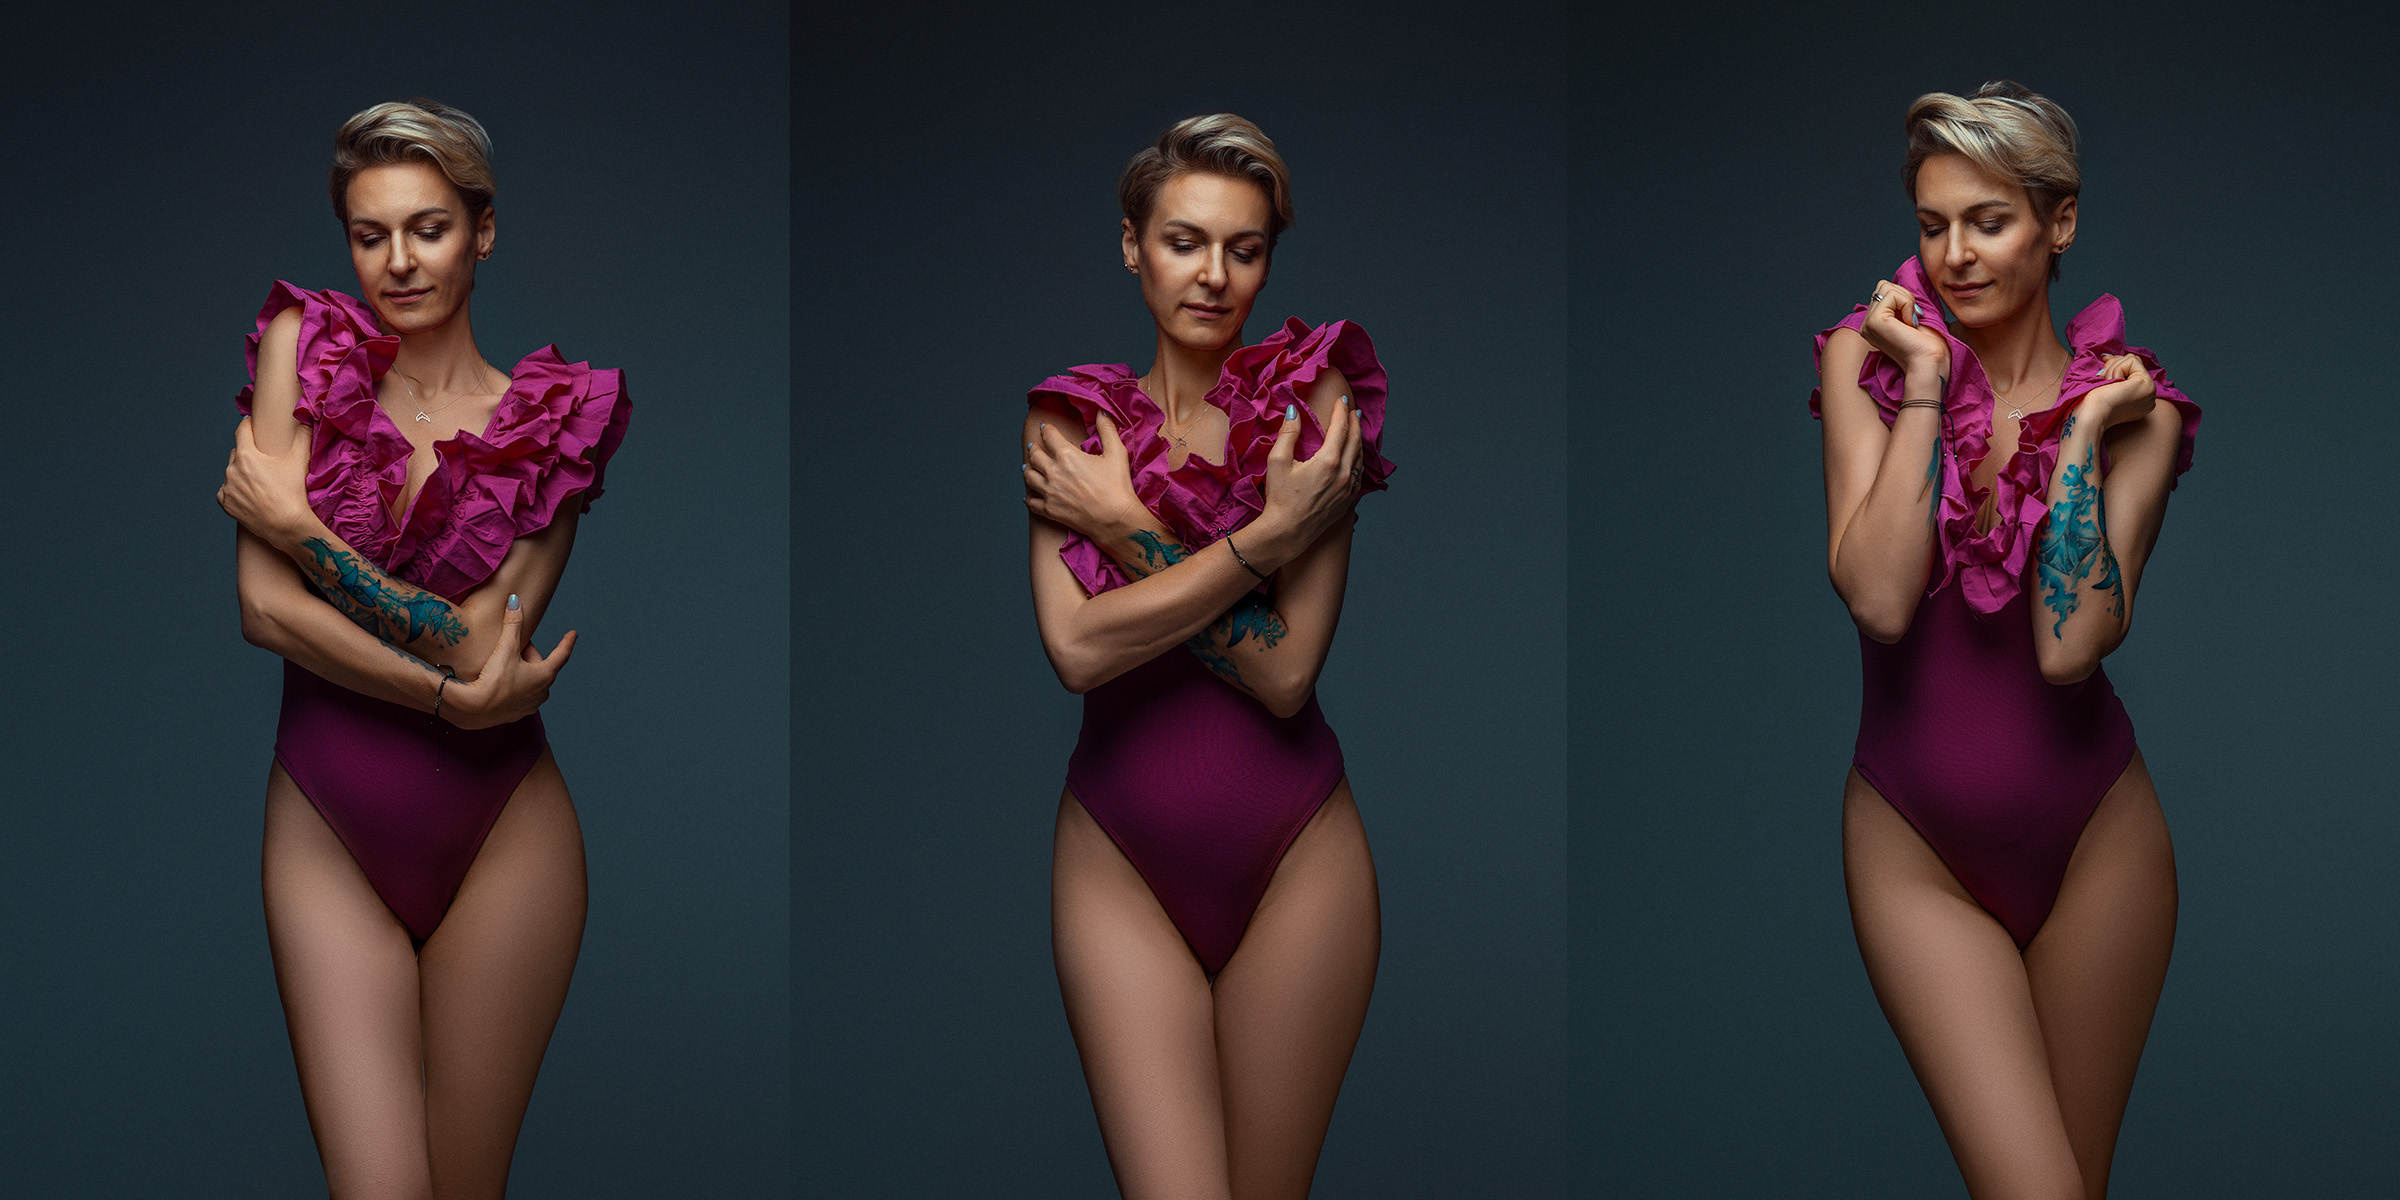
HERE ARE SOME POSING TIPS REGARDING POSING HANDS
What bends? Bend it! Joints are your secret weapon—bend the wrist, soften the fingers, and add curves to avoid stiff, straight lines. A slightly bent wrist can instantly make a pose look more dynamic and natural. Fingers shouldn’t be flat or rigid; instead, think soft, loose movements.
And don’t forget lighting and angles—they’re your best friends when it comes to showing off that effortless, expressive vibe. Done right, those hands will make your portraits pop and leave everyone asking how you did it!
Expert hand posing tips for creative photography.Transform portraits with Marta Ponsko’s posing tricks.Graceful hand posing techniques by Marta Ponsko for elegant portraits.Refined hand posing tips for confident portraits.Elegant hand positions for stunning portraits.Master expressive hand poses with Marta Ponsko.
IF YOU STILL WORK WITH MOUSE – SWITCH TO TABLET NOW!
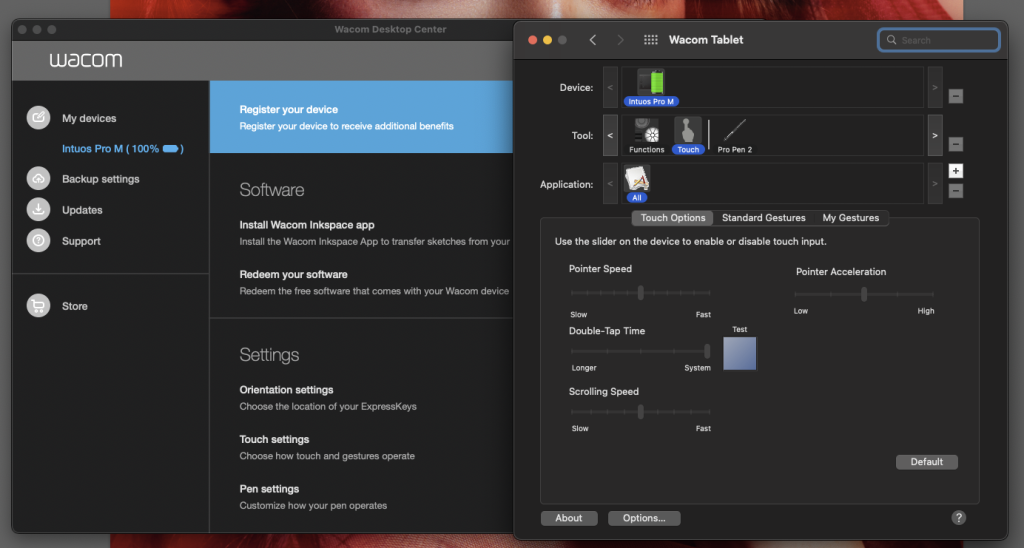
If you’re still using a mouse or touchpad on your laptop for retouching, you’re doing it wrong. Switching to a graphic tablet will transform your workflow, making retouching faster, easier, and much more precise. Let me show you what I use in my studio: the Wacom Intuos Pro (size M). It’s a game-changer for professional photographers, offering unparalleled control and efficiency. Whether you’re fine-tuning skin texture, adjusting lighting, or adding creative touches, this tool gives you the precision and fluidity you need to take your edits to the next level.
If you’ve already purchased a Wacom tablet but haven’t transitioned to using it effectively yet, the problem might lie in the default factory settings. Many photographers struggle at first because they haven’t optimized these settings, but with a few tweaks, the tablet can dramatically improve your workflow and retouching experience.
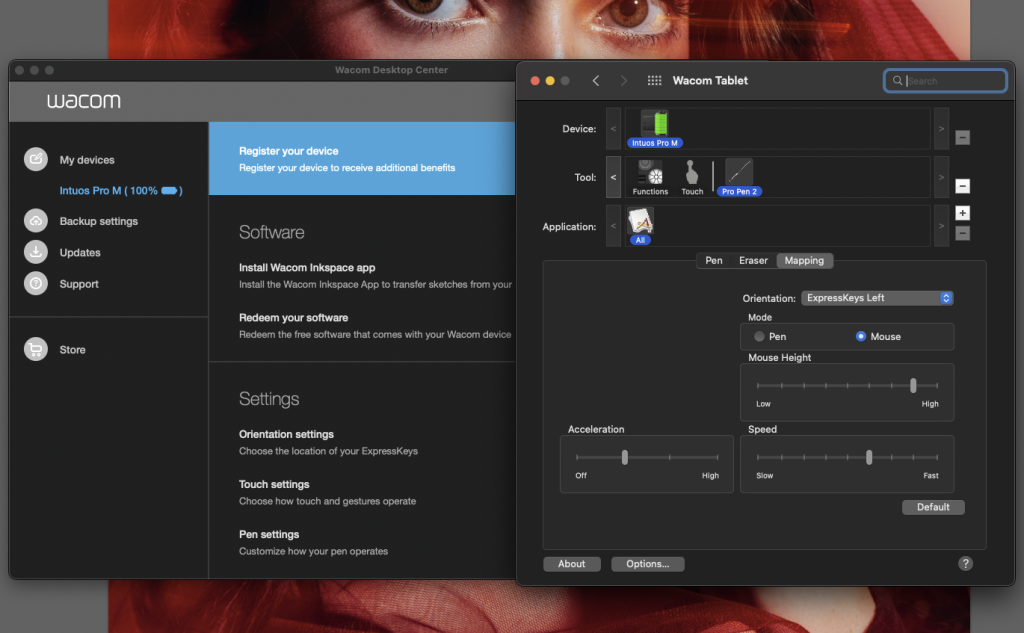
These are the settings I use on my Wacom tablet that help me work efficiently. One of the most important adjustments to make when you first install the tablet is to change the settings from Pen Mode to Mouse Mode. This allows you to control your desired area of the screen with your pen, making navigation and precision much easier during retouching.
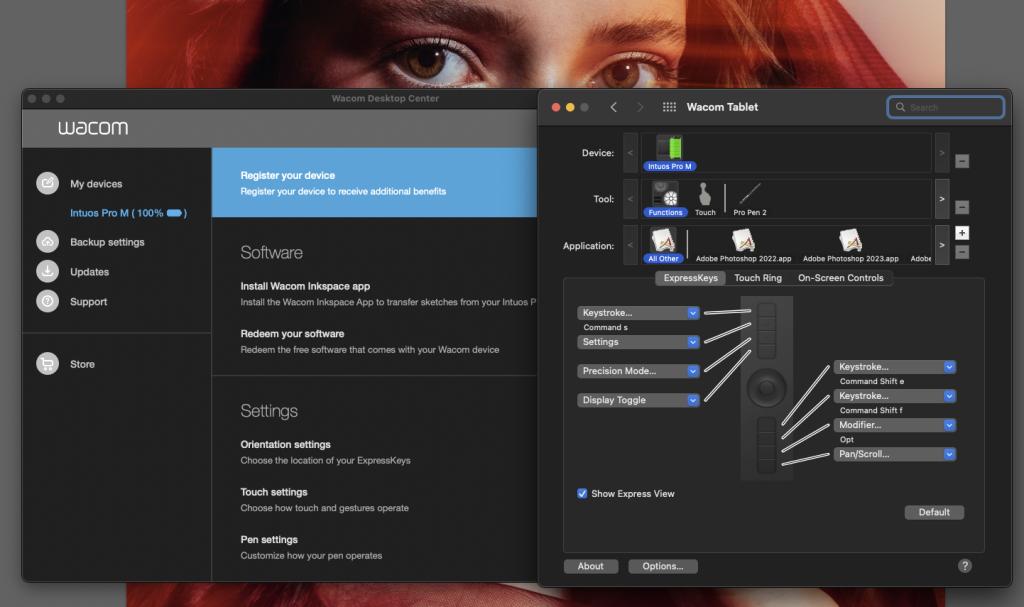
You can fully customize all the settings of your Wacom tablet and pen to match your personal workflow. This includes adjusting the pen’s sensitivity, speed, and pressure levels so it feels natural and responds exactly how you want it to. If you’re unsure where to start, don’t worry—start with the settings I’ve shared below as a baseline. From there, you can fine-tune them to suit your preferences and workflow. By personalizing these settings, you’ll ensure that your pen moves quickly and smoothly across the screen while maintaining just the right level of sensitivity for precise retouching.
After using the Wacom Intuos Pro (size M) for six years, I’ve realized I don’t use the full active area of the tablet. If I were to purchase one now, I’d probably switch to a smaller size for better portability and a more compact workflow. That said, one of the reasons I initially chose this particular tablet—and still love it—is its customizable function keys. These programmable keys allow you to assign your most frequently used actions or shortcuts, speeding up your retouching process even more. Whether it’s switching tools, zooming in, or undoing a step, these shortcuts save valuable time and keep your focus on creativity rather than clicking through menus.
If you’re interested in exploring more photography tips and tricks and creative maternity photography techniques – posing techniques and learning how to use studio light to showcase your pregnant models in the best and most interesting way, join us for a ONLINE CREATIVE MATERNITY PHOTOGRAPHY ACADEMY.
But if you more up to personal learning experience – let me invite you to in person workshops. These workshops are available in various locations. You can find all the details here: MATERNITY WORKSHOPS.
We noticed you're visiting from United States (US). We've updated our prices to United States (US) dollar for your shopping convenience. Use Polish złoty instead.Dismiss


 422 Google reviews