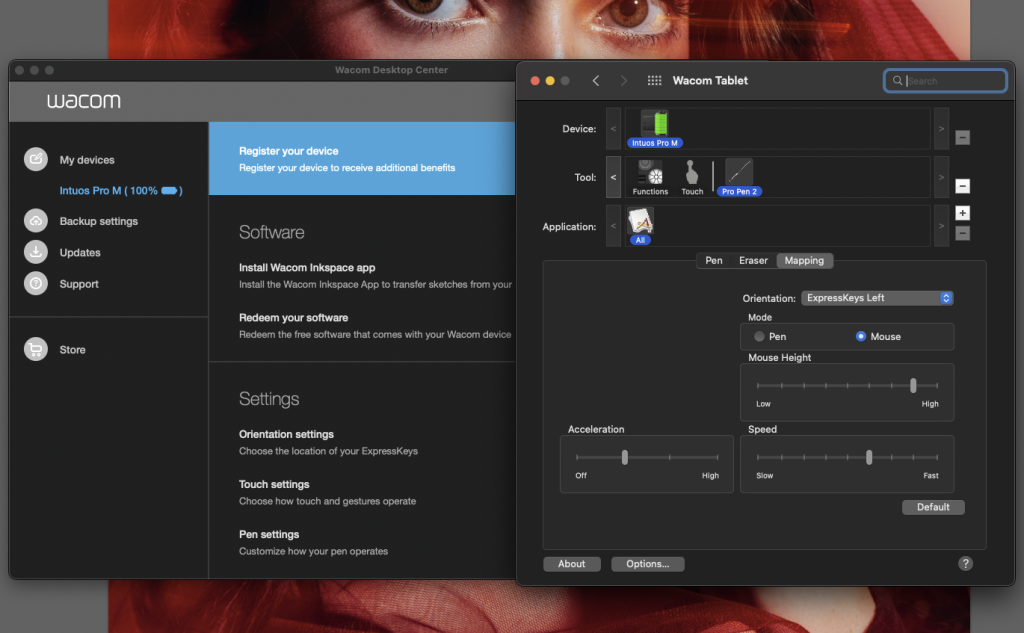
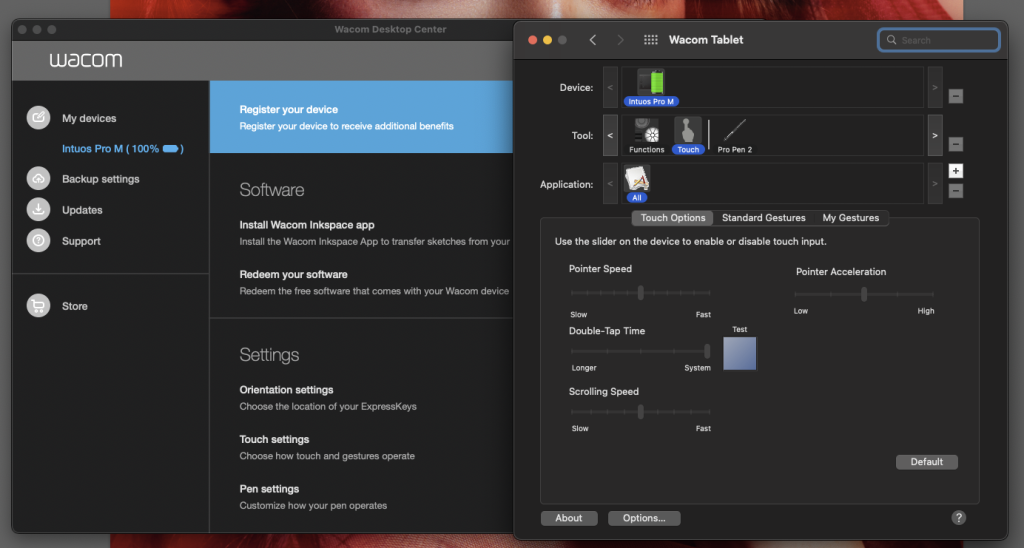
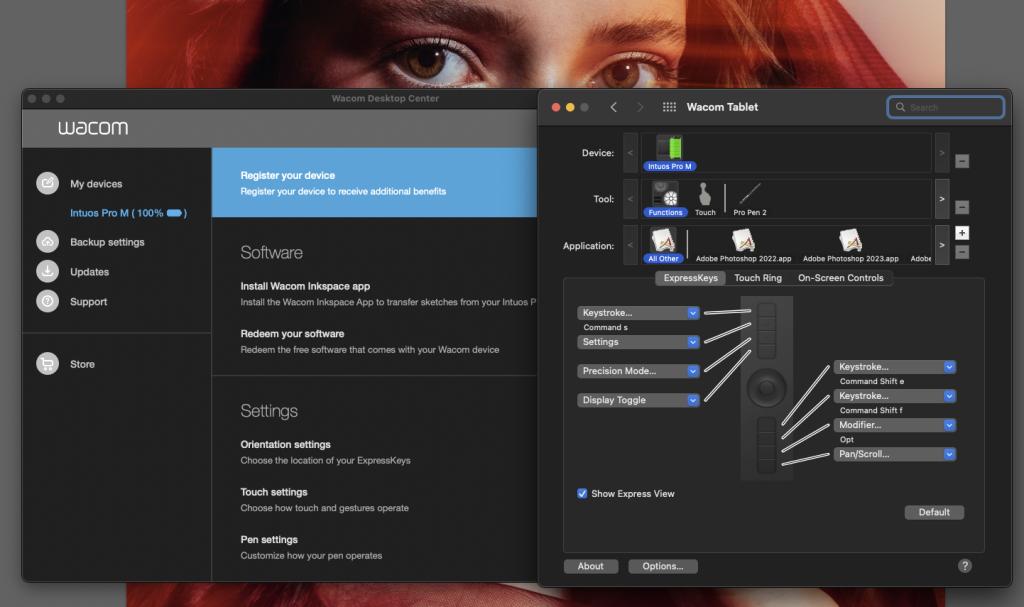
If you’re still using a mouse or touchpad on your laptop for retouching, you’re doing it wrong. Switching to a graphic tablet will transform your workflow, making retouching faster, easier, and much more precise. Let me show you what I use in my studio: the Wacom Intuos Pro (size M). It’s a game-changer for professional photographers, offering unparalleled control and efficiency. Whether you’re fine-tuning skin texture, adjusting lighting, or adding creative touches, this tool gives you the precision and fluidity you need to take your edits to the next level.
If you’ve already purchased a Wacom tablet but haven’t transitioned to using it effectively yet, the problem might lie in the default factory settings. Many photographers struggle at first because they haven’t optimized these settings, but with a few tweaks, the tablet can dramatically improve your workflow and retouching experience.
These are the settings I use on my Wacom tablet that help me work efficiently. One of the most important adjustments to make when you first install the tablet is to change the settings from Pen Mode to Mouse Mode. This allows you to control your desired area of the screen with your pen, making navigation and precision much easier during retouching.

You can fully customize all the settings of your Wacom tablet and pen to match your personal workflow. This includes adjusting the pen’s sensitivity, speed, and pressure levels so it feels natural and responds exactly how you want it to. If you’re unsure where to start, don’t worry—start with the settings I’ve shared below as a baseline. From there, you can fine-tune them to suit your preferences and workflow. By personalizing these settings, you’ll ensure that your pen moves quickly and smoothly across the screen while maintaining just the right level of sensitivity for precise retouching.

After using the Wacom Intuos Pro (size M) for six years, I’ve realized I don’t use the full active area of the tablet. If I were to purchase one now, I’d probably switch to a smaller size for better portability and a more compact workflow. That said, one of the reasons I initially chose this particular tablet—and still love it—is its customizable function keys. These programmable keys allow you to assign your most frequently used actions or shortcuts, speeding up your retouching process even more. Whether it’s switching tools, zooming in, or undoing a step, these shortcuts save valuable time and keep your focus on creativity rather than clicking through menus.

If you’re interested in exploring more photography tips and tricks and creative maternity photography techniques – posing techniques and learning how to use studio light to showcase your pregnant models in the best and most interesting way, join us for a ONLINE CREATIVE MATERNITY PHOTOGRAPHY ACADEMY.
But if you more up to personal learning experience – let me invite you to in person workshops. These workshops are available in various locations. You can find all the details here: MATERNITY WORKSHOPS.


 418 Google reviews