fbpx
Marta Ponsko facebook Marta Ponsko instagram

POSING TUTORIAL: SITTING POSES

Welcome to our maternity photoshoot posing tutorial. In this guide, we’ll explore the art of capturing comfortable sitting poses that highlight the natural beauty of pregnancy. Whether you’re a photographer looking to expand your portfolio or working with pregnant models keen on documenting this special journey, mastering sitting poses can add depth and elegance to your maternity photos.

MATERNITY SESSION, WET LOOK, CREATIVE PORTRAITS, PHOTOGRAPHY WORKSHOP

Here are some tips to remember when you pose your models sitting on the ground:

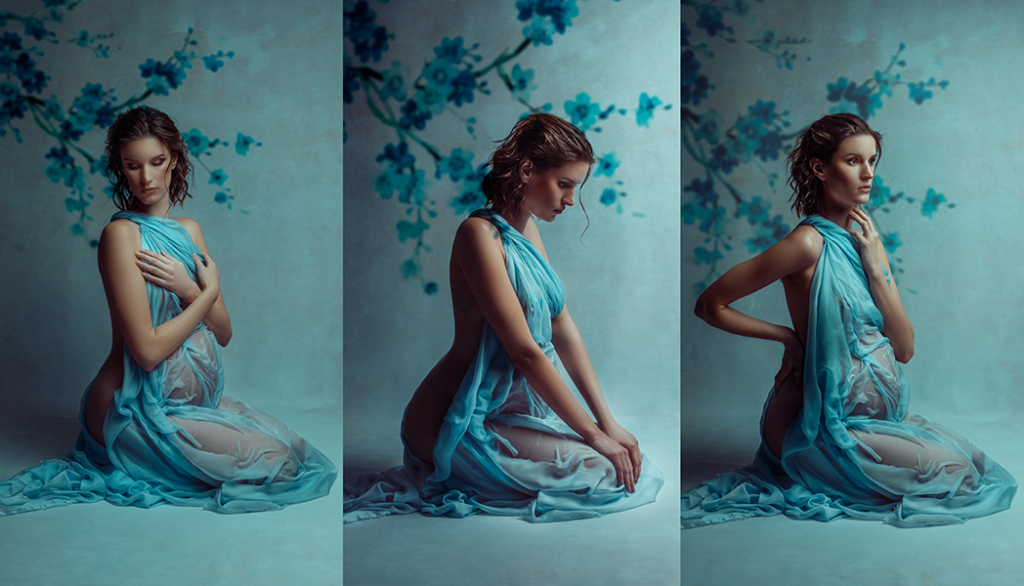
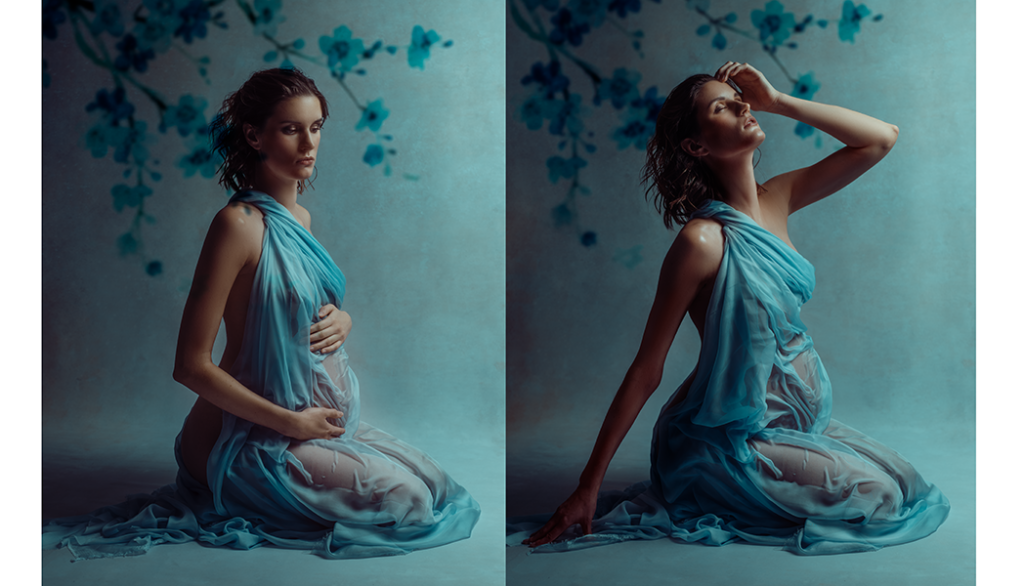
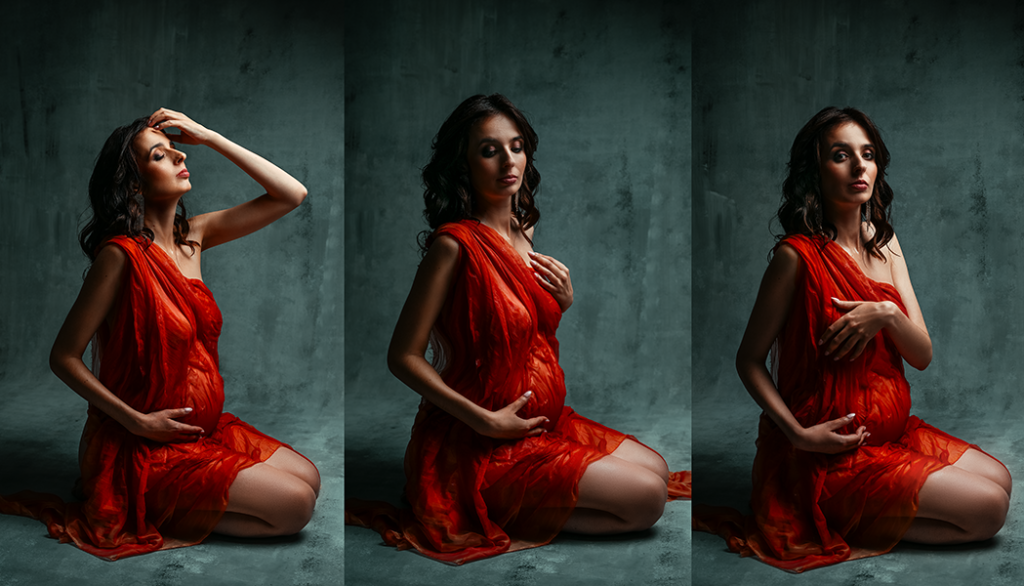
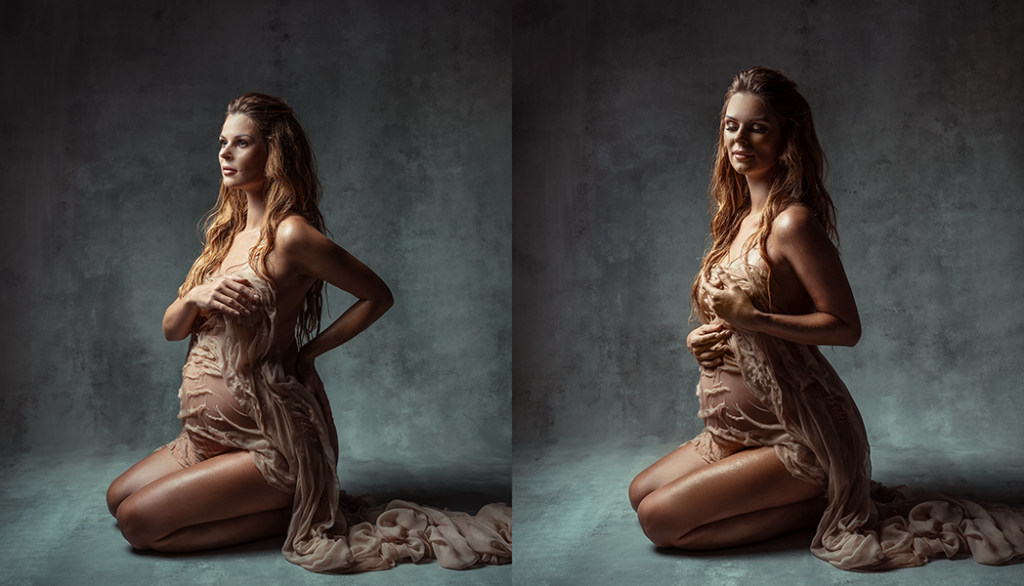
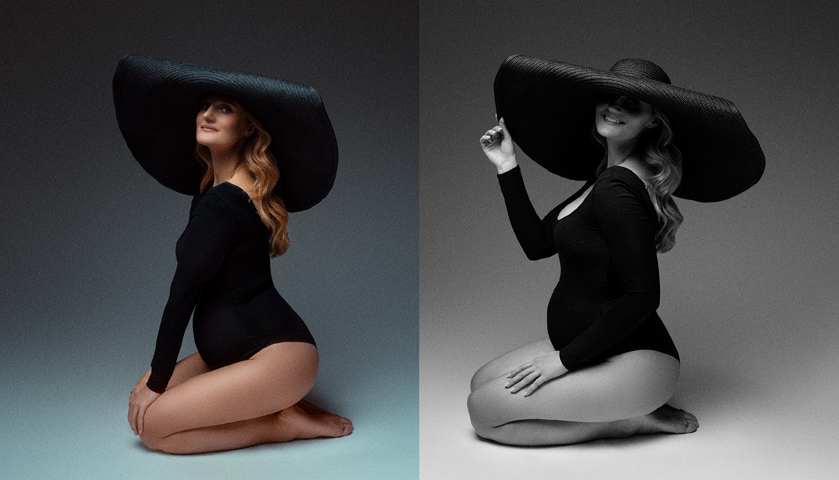
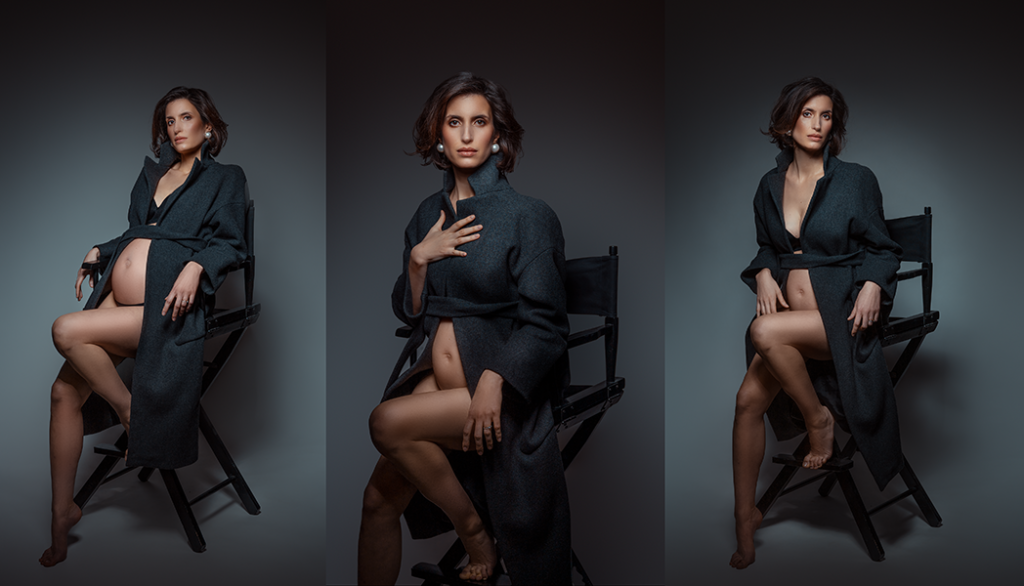
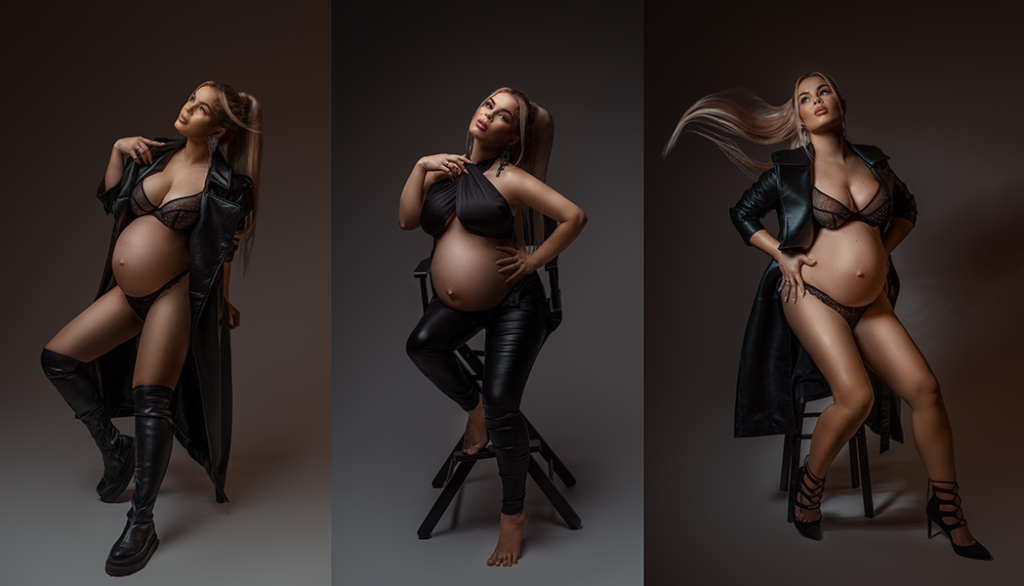
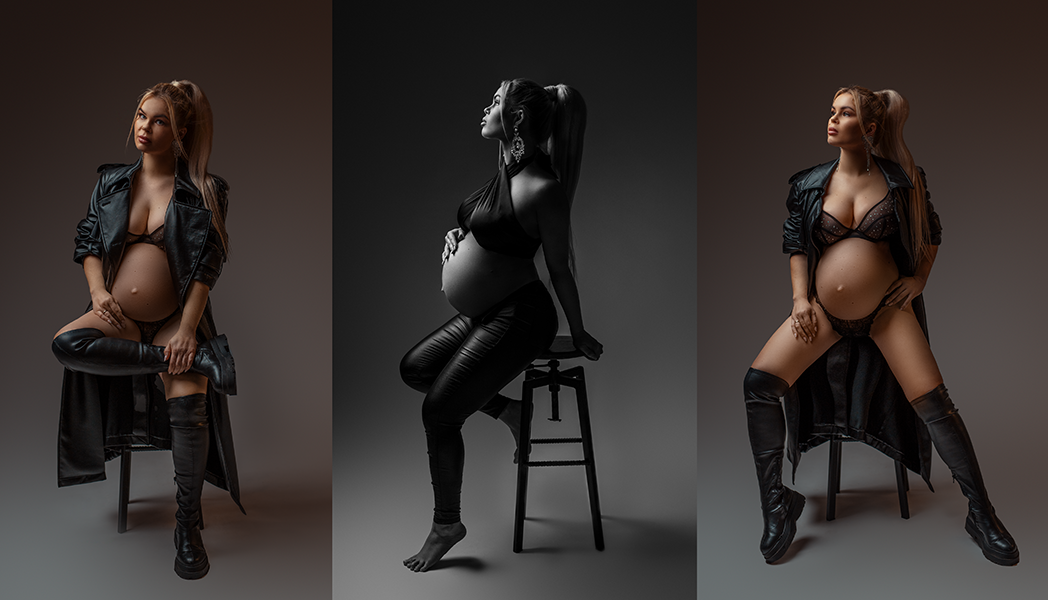
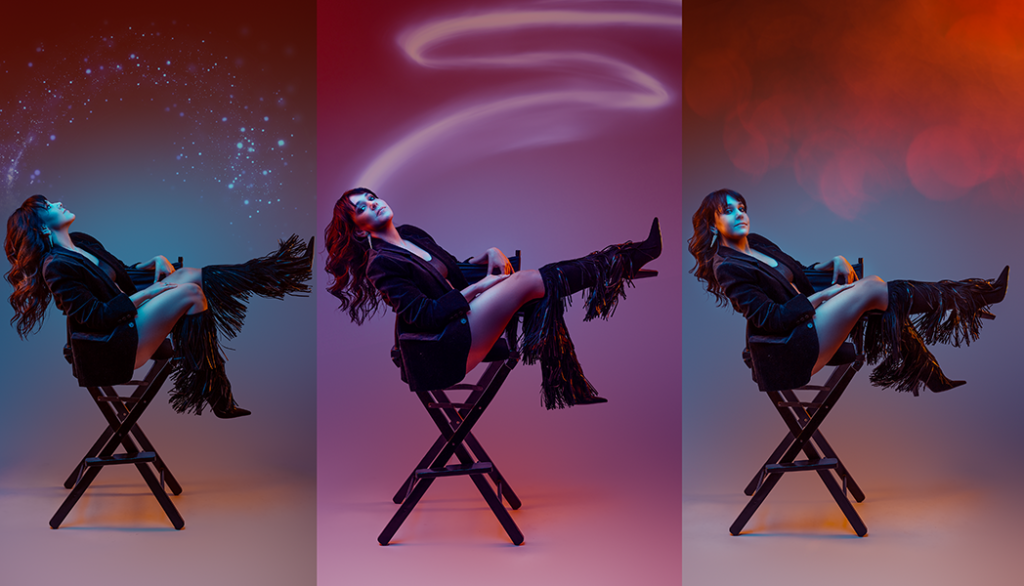
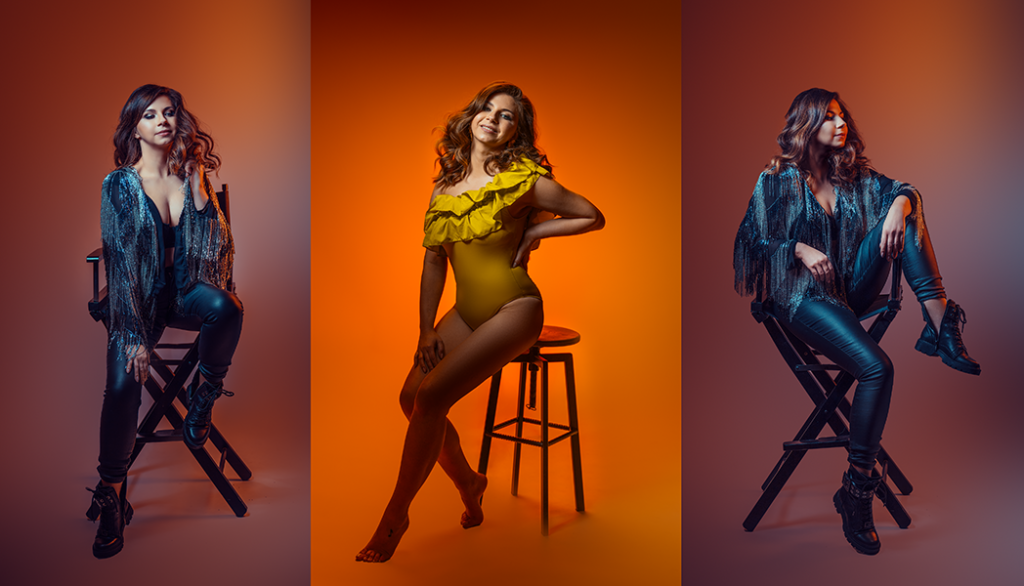
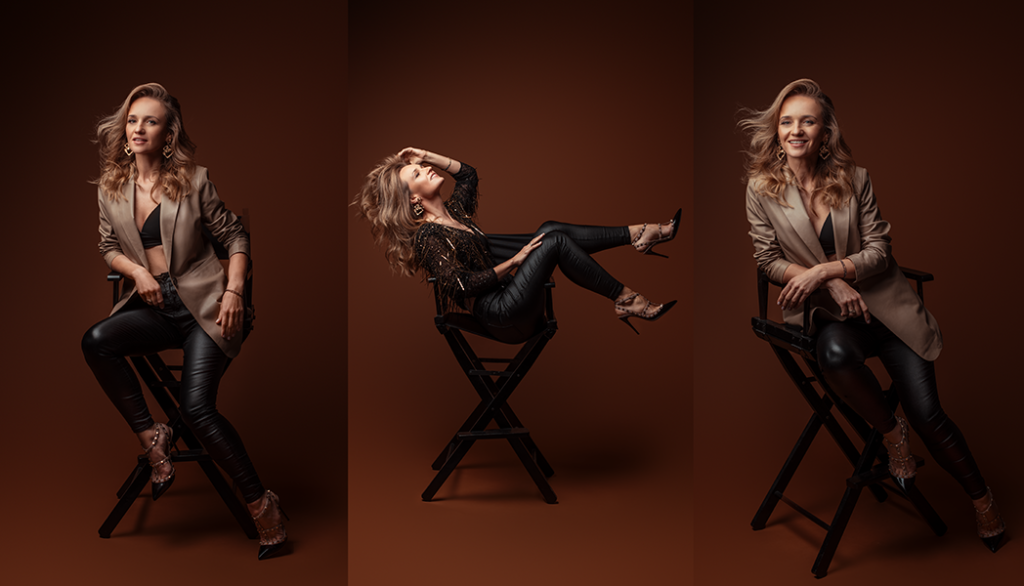
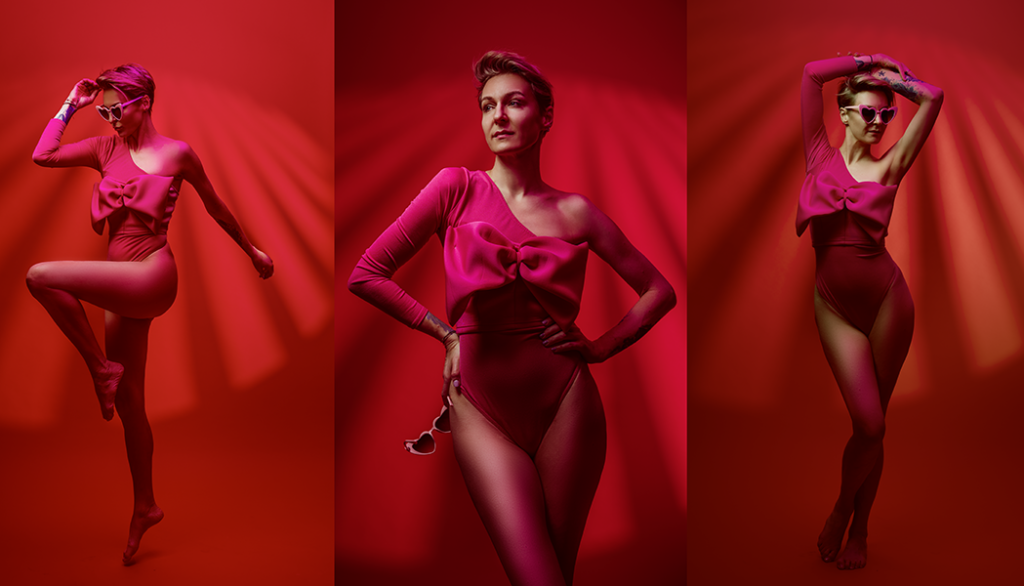
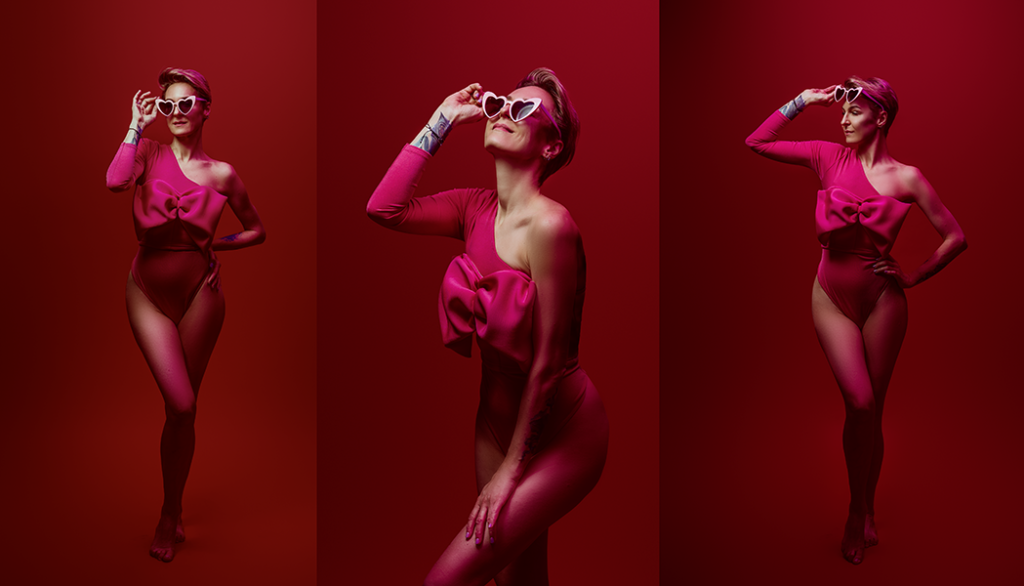
  1. Arch the Back: Encourage the model to gently arch her back to showcase her baby bump. This creates a flattering curve and emphasizes her pregnancy silhouette.
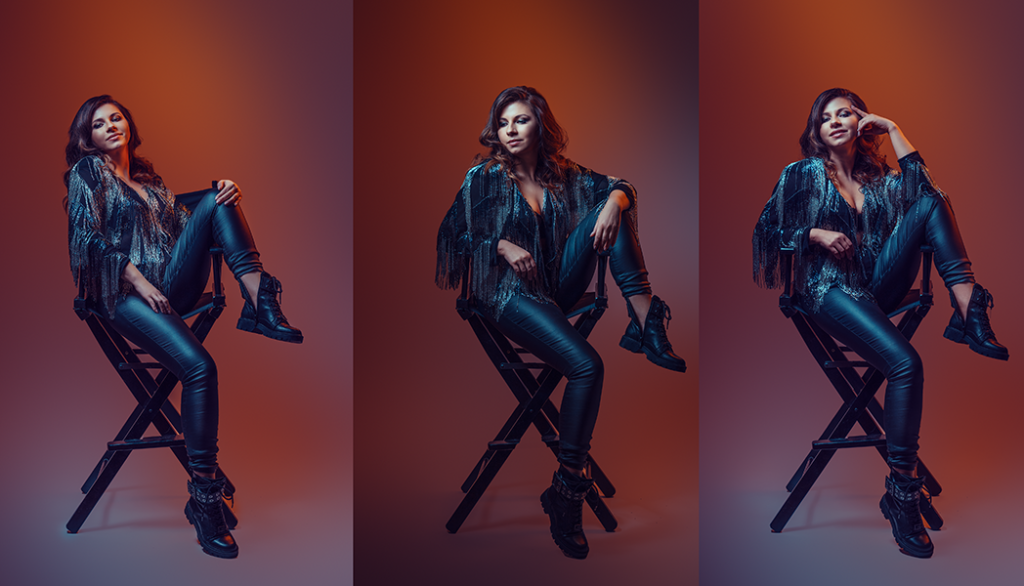
  2. Soft Hands: Remind the model to keep her hands relaxed and gentle. Avoid clenched fists, which can appear tense in photos. Soft hand placements add a delicate touch to the pose.
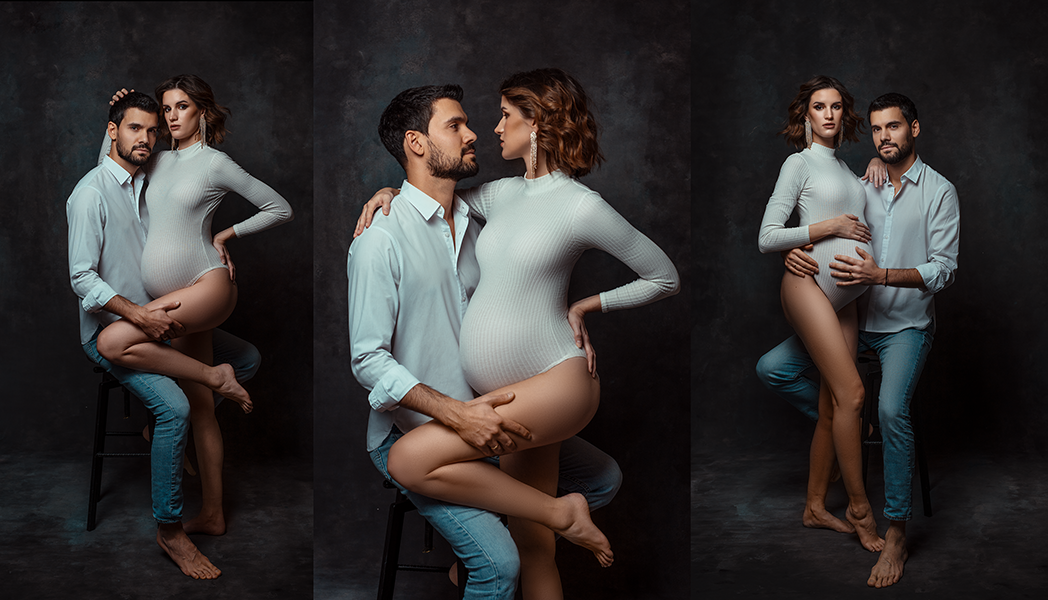
  3. Rise with Ease, Maintain Leg Definition: When transitioning from seated to standing positions, advise the model to rise slowly while maintaining a slight bend in the knees. This prevents flattening of the thighs and helps maintain leg definition, contributing to a more flattering pose. Using support if needed ensures comfort and stability during the transition.
  4. Straight Toes: Keep the model’s toes pointed or straightened to elongate the legs and maintain a graceful posture. This contributes to a more elegant and flattering pose.
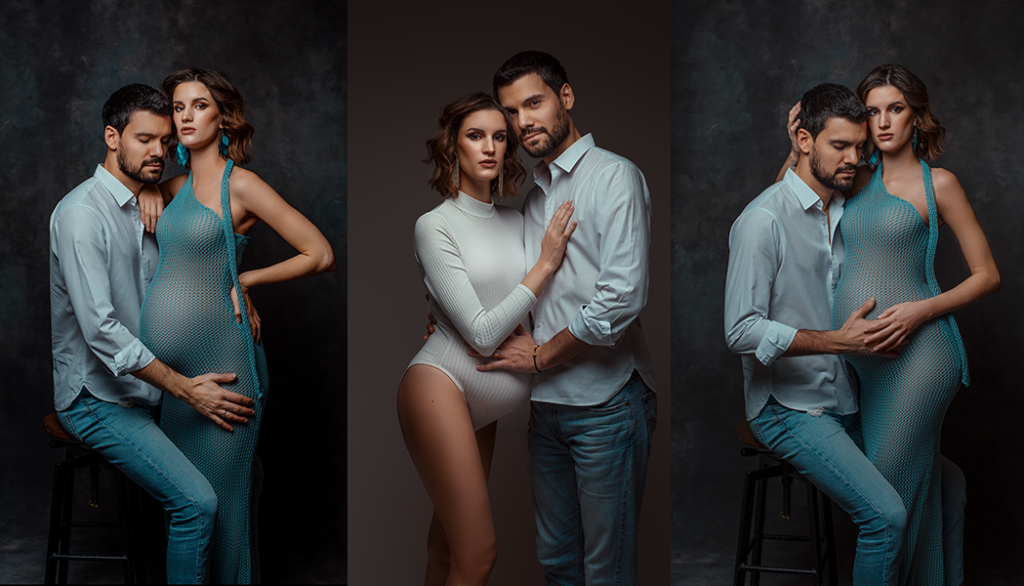
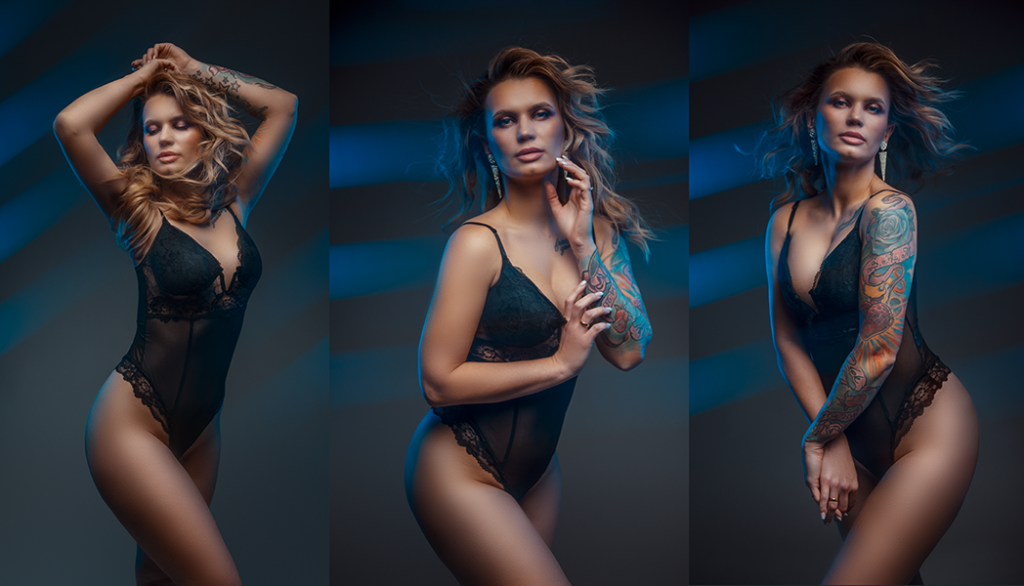
  5. Mind the Angles: Pay attention to the angles of the model’s body in relation to the camera. Experiment with different poses and perspectives to find the most flattering angles that highlight her pregnancy glow.
  6. Communication is Key: Maintain open communication with the model throughout the shoot. Check in regularly to ensure she’s comfortable and adjust poses or props as needed to accommodate her needs.

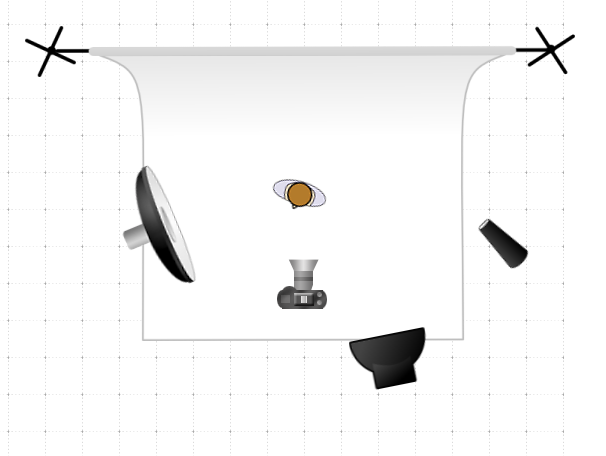
If you’re interested in exploring more posing techniques and learning how to use studio light to showcase your pregnant models in the best and most creative way, join us for a creative maternity photography workshop. These workshops are available in various locations. However, if you’re looking for a personalized 1-1 experience, I invite you to my studio in Warsaw, Poland. You can find all the details here: MATERNITY WORKSHOPS.

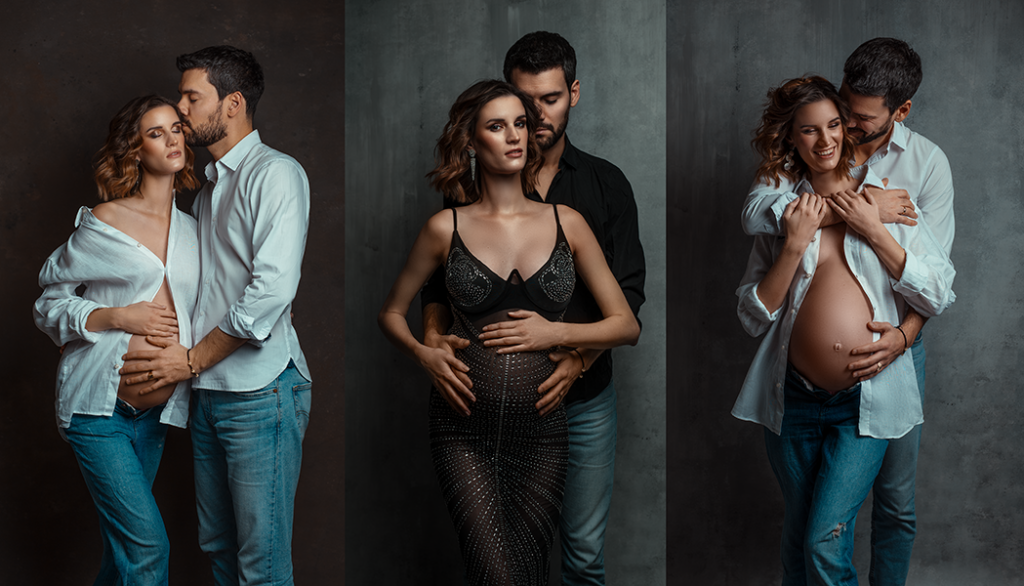
TIP: open this link on your phone, screenshot the below images. Create folder: POSING on your phone and save all your posing charts in one place so you can have easy access to them when you need them on your maternity or portrait session.

Alternatively: print the pictures and attach them to your mood board – mine hangs close to the place, where I stand while takich shots during my maternity sessions.

MATERNITY SESSION, WET LOOK, CREATIVE PORTRAITS, PHOTOGRAPHY WORKSHOP

ROMANTIC COUPLE POSES FOR YOUR MATERNITY SESSION

Embarking on the journey of parenthood is a deeply romantic and intimate experience for couples, and capturing this special time through photography is an art form in itself. Maternity sessions offer a unique opportunity to celebrate the love, anticipation, and connection between partners as they eagerly await the arrival of their little one. In this article, we delve into the world of romantic couple poses during maternity sessions, exploring how to beautifully showcase the bond between expectant parents.

Capturing the intimate connection between partners is a central focus of maternity photography. In this guide, we’ll explore expert tips to help photographers and couples navigate the art of posing for maternity photos. Here are some tips:

Embrace the connection: Encourage the couple to hold hands, embrace, and share tender moments. Their connection and love for each other will beautifully complement the anticipation of their new arrival

Highlight the bump: Position the couple to showcase the baby bump. This could involve gentle touches, framing the bump with their hands, or positioning the couple in a way that draws attention to this special feature

Capture natural interactions: Encourage the couple to interact naturally, sharing smiles, laughter, and soft whispers. Candid moments of genuine affection often result in some of the most heartfelt and memorable photographs

Vary poses and perspectives: Experiment with a variety of poses, angles, and perspectives to create a diverse and dynamic set of images

POSES ON HIGH CHAIR

Discover the secrets to striking model-worthy poses while seated! In this blog post, I’ll share five invaluable tips and techniques for perfecting your chair posing game. From creative pose ideas to essential guidance on body alignment, leg placement, and hand positioning, you’ll learn how to effortlessly exude elegance and avoid any awkward moments in front of the camera. Let’s kick things off with the fundamentals to unlock your photogenic potential!

LEAN FORWARD: Opting to lean forward in sitting poses can work wonders for your photos. By positioning your body slightly closer to the camera, you create the illusion of a slimmer frame while drawing attention to your face. Remember to maintain good posture by pulling your shoulders back and down, and gently extending your chin forward. This technique not only enhances your overall appearance but also adds a touch of elegance to your seated stance.

ARCH YOUR BACK: Embracing a subtle arch in the back can beautifully accentuate your body’s natural curves. When seated on the edge of a chair, gently arch your lower back and lift your chest slightly. This pose not only enhances your silhouette but also radiates confidence, making it perfect for both portraits and maternity photos. By gracefully sculpting your posture, you’ll capture a striking and empowered presence in every shot.

DROP YOUR SHOULDERS: Direct your attention to dropping your shoulders down and gently pulling them back. This simple adjustment promotes an open and confident posture, ensuring that tension is relieved from the upper body. By maintaining this relaxed stance, you’ll exude ease and poise, enhancing the overall appeal of your pose in any setting

FEET ON TOES: To achieve an elongated and flattering leg posture, try placing your feet on your toes or pointing them slightly. This technique creates a subtle lengthening effect, accentuating the lines of your body, particularly when wearing tight pants or stockings. By elongating your legs in this way, you’ll enhance the overall symmetry and elegance of your pose, resulting in a more visually appealing composition.

RELAXED HANDS: Maintain a relaxed and natural hand posture to enhance the fluidity of your pose. Avoid stiffness by lightly resting your hands on the arms of the chair, gently overlapping or interlacing your fingers, or softly placing one hand on your belly for maternity shoots. Steer clear of tensing your fingers or making a fist, as this can detract from the overall ease and gracefulness of your pose. By keeping your hands relaxed and subtly positioned, you’ll exude effortless elegance and confidence in every frame.

POSING WITH GLASSES ON

Here are some shots inspired by lighting set ups by Lindsay Adler…. This set up requires 3 flashes and red backdrop. There are 3 different modifiers (below you will find the lighting chart with location of all the lights):

  • backdrop light with line patterns was created with BFP optical snoot from Godox with gobo (you can replace it with any other gobo pattern such as hearts, leaves or dots)
  • beauty dish was used as key light
  • Reflector with bar doors was used to fill the shadows with magenta color

I put together this outfit using just two pieces: a cute pink bodysuit and a lovely pink bow top, both from AR Backdrops. And guess what? The sunglasses I’m rocking? I snagged them on Allie for just 2 euros! This outfit shows off my knack for mixing and matching pieces to create a standout look. It’s all about combining different elements to make something unique and eye-catching. So next time you’re putting together an outfit, don’t be afraid to get creative and mix things up!

In every setup, I make it a point to explore a range of poses to capture the essence of versatility. Whether it’s striking full-body shots that showcase the entirety of the ensemble or intimate close-ups that highlight intricate details, I aim to offer a diverse array of poses in each session. By doing so, I not only ensure that every aspect of the model and outfit is showcased but also deliver a portfolio that boasts versatility and depth.

SCREENSHOT THE PHOTOS FOR YOUR NEXT PHOTOSHOOT:

Try a variety of angles for the sunglasses to see which one best suits the form of your face and the emotion you want the picture to convey. Placing them atop your head can provide a more carefree, laid-back feel, while tilting them slightly downward can impart a sense of mystery or refinement. Make the model laugh, smile, jump or dance. What helps me to create a good and cheerful mood is proper music 🙂

Play with Reflections: Make use of the sunglasses’ reflective surfaces to give the picture more visual appeal. Try moving the camera and yourself in different ways to get interesting reflections of the surrounding environment, the photographer, or even your own face.

Here is a chart depicting the lighting setup I used for each shoot. I played with the amount of lights and angles to get the best look so do not hesitate to experiment and try new set ups to get the best result in your studio.

AND IF YOU WANT TO LEARN MORE WITH ME – let me invite you to my maternity and portrait workshops. List of available locations can be found here: MATERNITY AND PORTRAIT PHOTOGRAPHY MASTERCLASS WITH Marta Ponsko.

HOW TO CREATE HOLLYWOOD STYLE IN PORTRAITS

The streaks of light, light dots, the haze… this Hollywood movie style was created fully in camera. It was achieved with 3 lights and a bit of fog from fog machine.

The lighting strikes are produced by 2 strip boxes – they were upgraded with DYI felt covers. So here are some tips, how to make them by yourself (you can buy them as well if you do not have time to do them yourself…).

WHAT YOU NEED is a piece of black fabric at leat 10 cm longer and wider than the size of your strip box. I selected black felt because it is rigid and does not change shape, it is much easier to attach it to the strip box. The only disadvantage of using felt is that all the dust and hair attaches to it easily.

I cut out 4 circles with a diameter of 16 cm. With 16 cm distance between each.

To mount the felt fabric on the strip box, I used velcro – or just one piece of velcro, (cause felt sticks to it easily). The velcro was attached to strip box with hot glue.

Attach your felt overlay on the strip box and…. enjoy experimenting with studio light!

AND IF YOU WANT TO LEARN MORE WITH ME – let me invite you to my maternity and portrait workshops. List of available locations can be found here: MATERNITY AND PORTRAIT PHOTOGRAPHY MASTERCLASS WITH Marta Ponsko.

maternity photography studio, studio fotografii ciążowej